Tutorial for DOPE Inference with Triton#
Overview#
This tutorial walks you through a graph to estimate the 6DOF pose of a target object using DOPE using different backends. It uses input monocular images from a rosbag. The different backends show are:
PyTorch and ONNX
TensorRT Plan files with Triton
PyTorch model with Triton
Note
The DOPE converter script only works on x86_64, so the
resultant onnx model following these steps must be copied to the
Jetson.
Tutorial Walkthrough#
Complete until
Run Launch Fileof the quickstart here.Install Isaac ROS Triton:
sudo apt-get install -y ros-jazzy-isaac-ros-triton
Make a directory called
dope_ketchupinside${ISAAC_ROS_WS}/isaac_ros_assets/models/triton, which will serve as the model repository. This will be versioned as1. The downloaded model will be placed here:mkdir -p ${ISAAC_ROS_WS}/isaac_ros_assets/models/triton/dope_ketchup/1 && \ cp ${ISAAC_ROS_WS}/isaac_ros_assets/models/dope/Ketchup.pth ${ISAAC_ROS_WS}/isaac_ros_assets/models/triton/dope_ketchup/
Now select a backend. The PyTorch and ONNX options MUST be run on
x86_64:To run ONNX models with Triton, export the model into an ONNX file using the
dope_converterscript provided:ros2 run isaac_ros_dope dope_converter.py --format onnx \ --input ${ISAAC_ROS_WS}/isaac_ros_assets/models/triton/dope_ketchup/Ketchup.pth --output ${ISAAC_ROS_WS}/isaac_ros_assets/models/triton/dope_ketchup/1/model.onnx \ --input_name INPUT__0 --output_name OUTPUT__0 --row 720 --col 1280
To run
TensorRT Planfiles with Triton, first copy the generatedonnxmodel from the above point to the target platform (e.g. a Jetson or anx86_64machine). The model will be assumed to be copied to${ISAAC_ROS_WS}/isaac_ros_assets/models/triton/dope_ketchup/1/model.onnxinside the Isaac ROS environment. Then usetrtexecto convert theonnxmodel to aplanmodel:/usr/src/tensorrt/bin/trtexec --onnx=${ISAAC_ROS_WS}/isaac_ros_assets/models/triton/dope_ketchup/1/model.onnx --saveEngine=${ISAAC_ROS_WS}/isaac_ros_assets/models/triton/dope_ketchup/1/model.plan
To run PyTorch model with Triton (inferencing PyTorch model is supported for x86_64 platform only), the model needs to be saved using
torch.jit.save(). The downloaded DOPE model is saved withtorch.save(). Export the DOPE model using thedope_converterscript:ros2 run isaac_ros_dope dope_converter.py --format pytorch \ --input ${ISAAC_ROS_WS}/isaac_ros_assets/models/triton/dope_ketchup/Ketchup.pth --output ${ISAAC_ROS_WS}/isaac_ros_assets/models/triton/dope_ketchup/1/model.pt --row 720 --col 1280
Create a configuration file for this model at path
${ISAAC_ROS_WS}/isaac_ros_assets/models/triton/dope_ketchup/config.pbtxt. Note that name has to be the same as the model repository. Depending on the platform selected from a previous step, a slightly differentconfig.pbtxtfile must be created:onnxruntime_onnx(.onnxfile),tensorrt_plan(.planfile) orpytorch_libtorch(.ptfile):name: "dope_ketchup" platform: <insert-platform> max_batch_size: 0 input [ { name: "INPUT__0" data_type: TYPE_FP32 dims: [ 1, 3, 720, 1280 ] } ] output [ { name: "OUTPUT__0" data_type: TYPE_FP32 dims: [ 1, 25, 90, 160 ] } ] version_policy: { specific { versions: [ 1 ] } }
The
<insert-platform>part should be replaced withonnxruntime_onnxfor.onnxfiles,tensorrt_planfor.planfiles andpytorch_libtorchfor.ptfiles.Note
The DOPE decoder currently works with the output of a DOPE network that has a fixed input size of 640 x 480, which are the default dimensions set in the script. In order to use input images of other sizes, make sure to crop or resize using ROS 2 nodes from Isaac ROS Image Pipeline or similar packages. If another image resolution is desired, refer to here.
Note
- The model name must be
model.<selected-platform-extension>.
Start
isaac_ros_dopeusing the launch file:ros2 launch isaac_ros_dope isaac_ros_dope_triton.launch.py model_name:=dope_ketchup model_repository_paths:=[${ISAAC_ROS_WS}/isaac_ros_assets/models/triton] input_binding_names:=['INPUT__0'] output_binding_names:=['OUTPUT__0'] object_name:=Ketchup
Note
object_nameshould correspond to one of the objects listed in the DOPE configuration file, and the specified model should be a DOPE model that is trained for that specific object.Open another terminal and activate the Isaac ROS environment:
isaac-ros activateThen, play the rosbag:
ros2 bag play -l ${ISAAC_ROS_WS}/isaac_ros_assets/isaac_ros_dope/quickstart.bag
Open another terminal window and attach to the same container. You should be able to get the poses of the objects in the images through
ros2 topic echo:In a third terminal, activate the Isaac ROS environment:
isaac-ros activateros2 topic echo /detections
Note
We are echoing
/detectionsbecause we remapped the original topic/dope/detectionstodetectionsin the launch file.Install RViz and the
vision_msgsRViz plugin:sudo apt-get install -y ros-jazzy-rviz2 ros-jazzy-vision-msgs-rviz-plugins source /opt/ros/jazzy/setup.bash
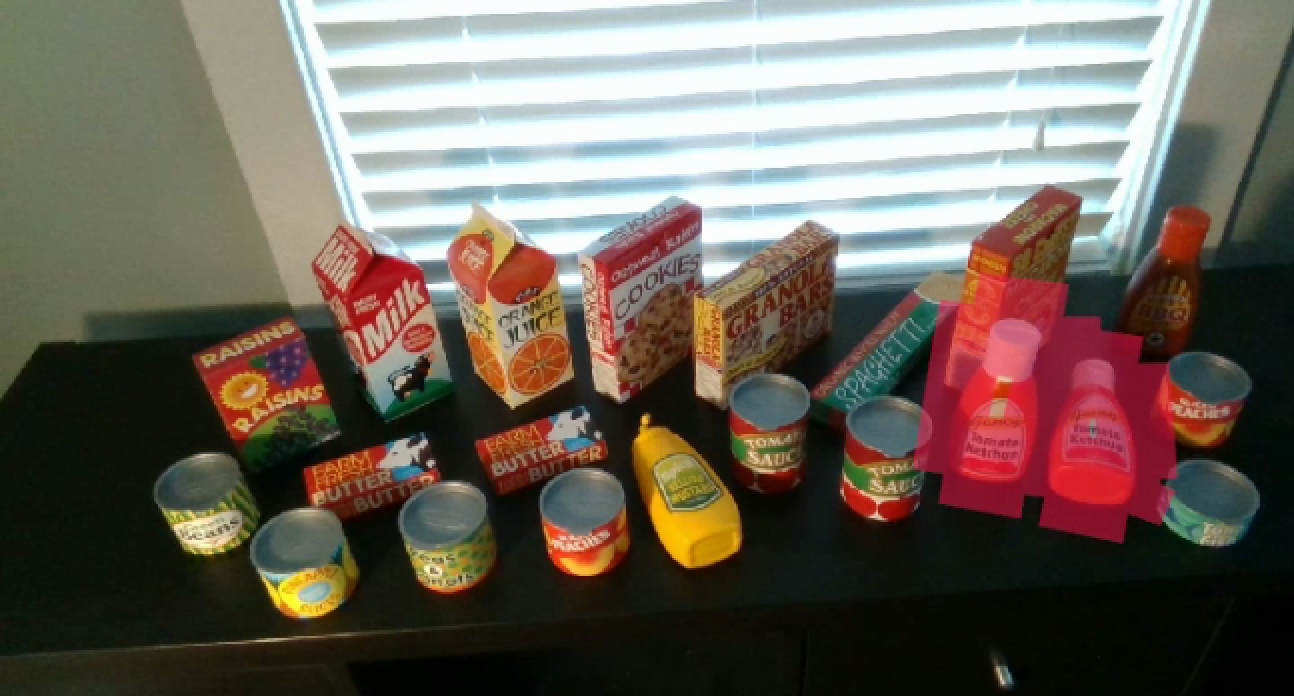
Now visualize the detections array in RViz2:
rviz2
Make sure to update the
Fixed Frametotf_camera. Then click on theAddbutton, selectBy display typeand chooseDetection3DArrayundervision_msgs_rviz_plugins. Expand theDetection3DArraydisplay and change the topic to/detections. Check theOnly Edgeoption. Then click on theAddbutton again and selectBy Topic. Under/dope_encoder, expand the/resizedrop-down, select/image, and click theCameraoption to see the image with the bounding box over detected objects. Refer to the pictures below.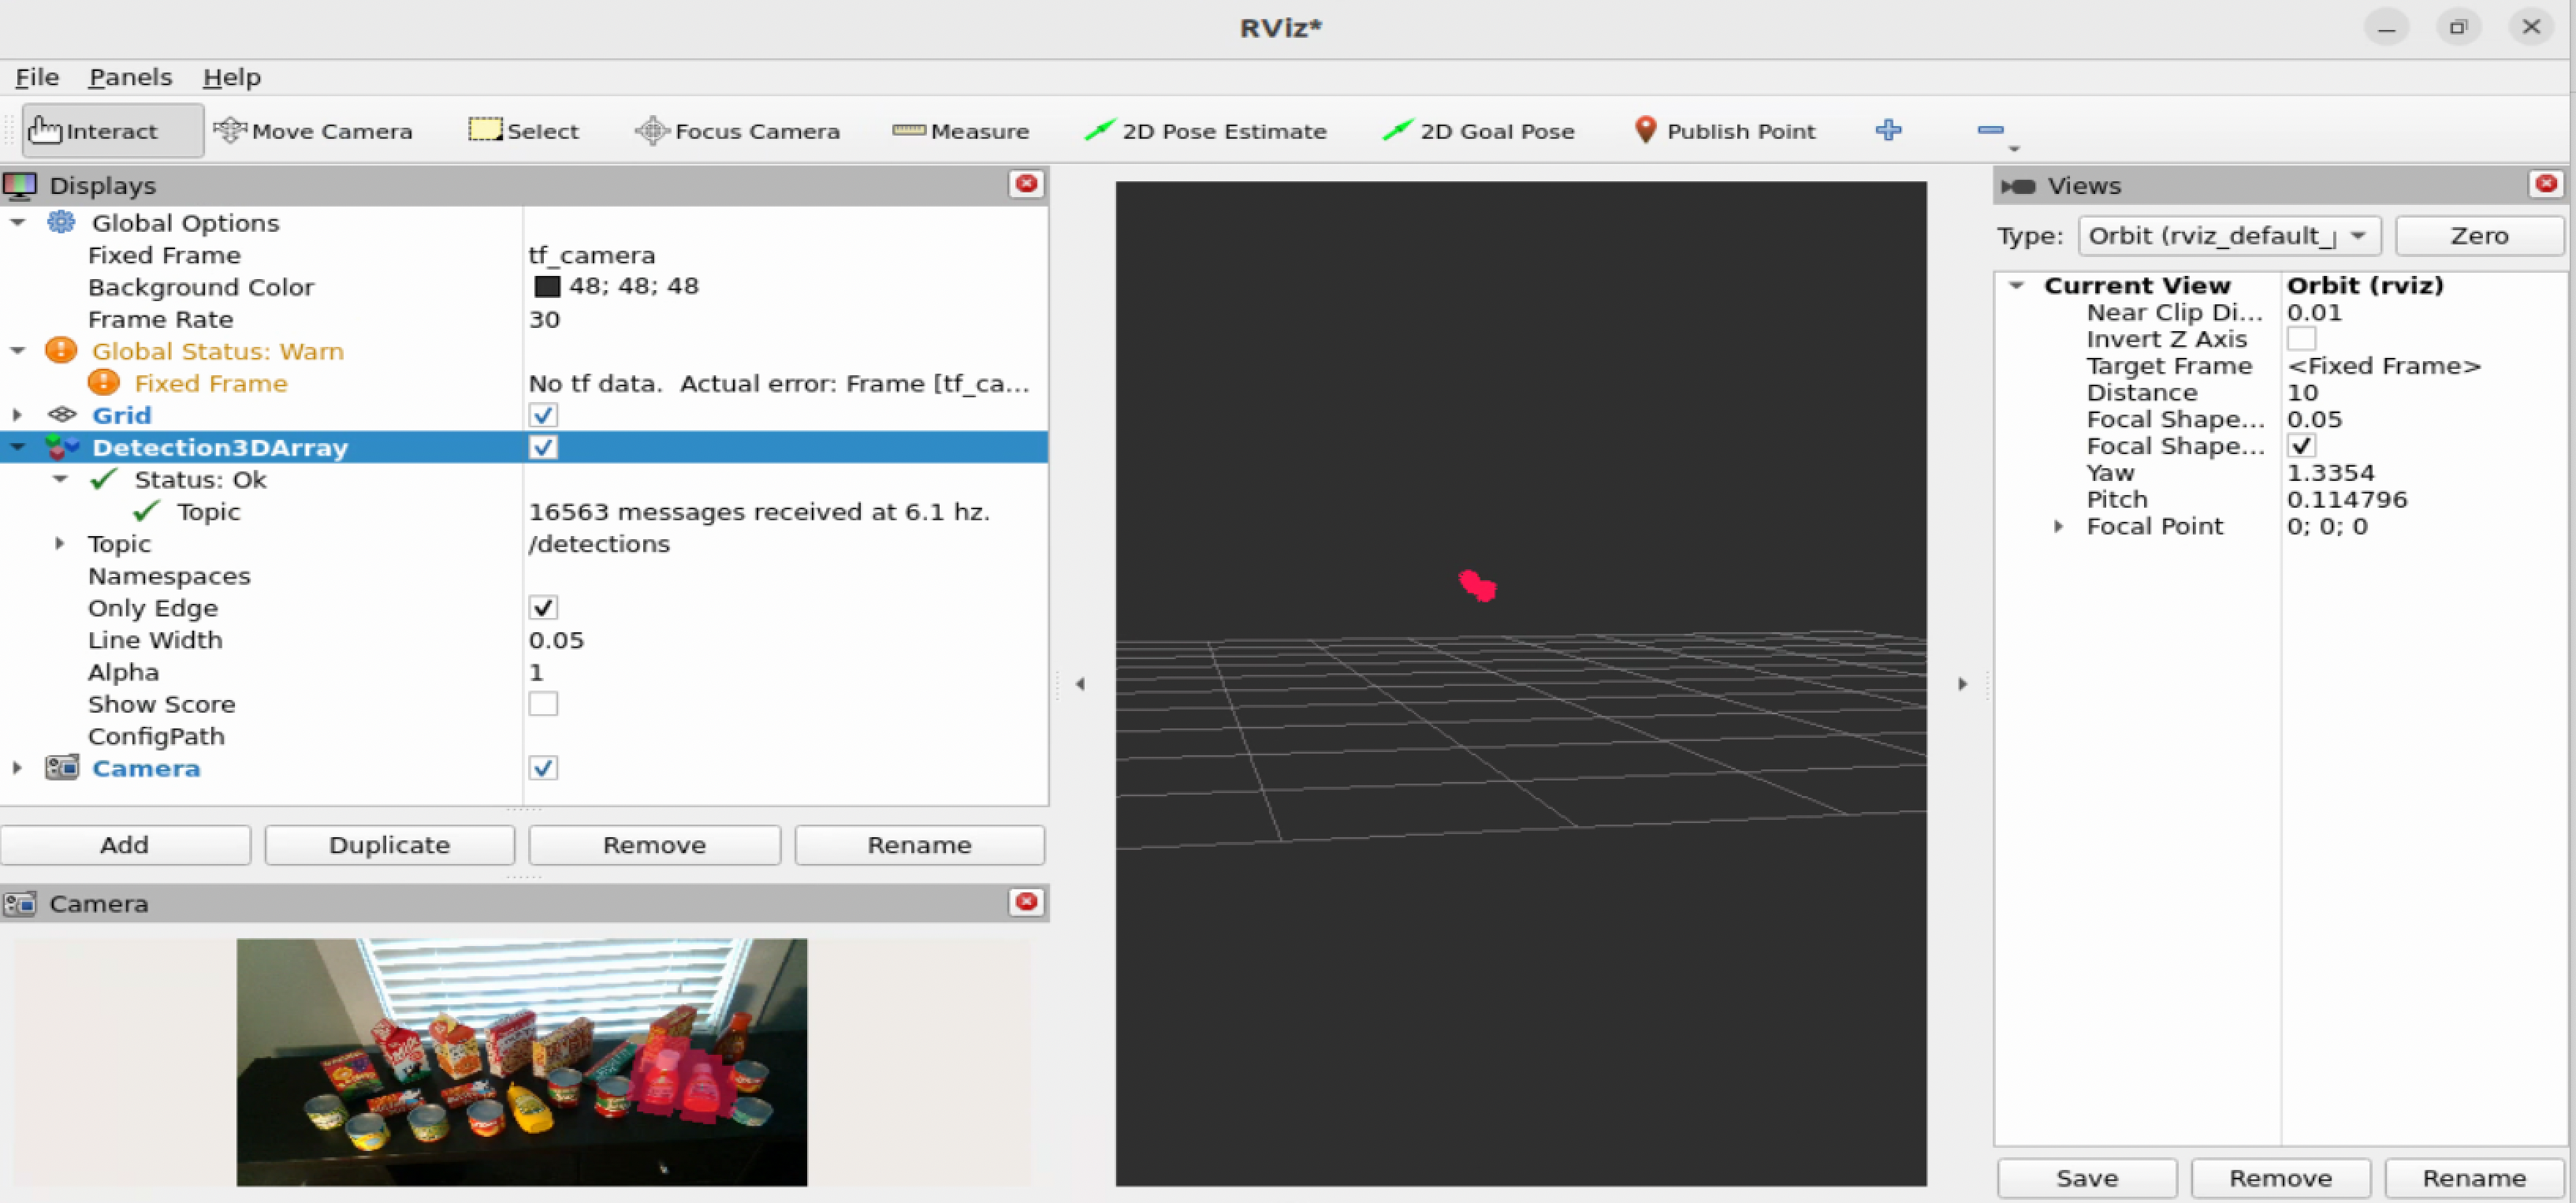
Note
For best results, crop/resize input images to the same dimensions your DNN model is expecting.