Tutorial: Run all Sensors on the Nova Orin Developer Kit
This tutorial walks you through visualizing all sensors on your Nova Orin Developer Kit.
For this tutorial, you must have successfully set up your Nova Orin Developer Kit using the setup instructions here, and you must be familiar with the Isaac ROS development environment.
Run the Application
SSH into your Nova Orin Developer Kit (instructions).
Build/install the required packages and run the app:
Pull the Docker image:
docker pull nvcr.io/nvidia/isaac/nova_developer_kit_bringup:release_3.2-aarch64
Run the Docker image:
docker run --privileged --network host \
    -v /dev/*:/dev/* \
    -v /tmp/argus_socket:/tmp/argus_socket \
    -v /etc/nova:/etc/nova \
    nvcr.io/nvidia/isaac/nova_developer_kit_bringup:release_3.2-aarch64 \
    ros2 launch nova_developer_kit_bringup sensors.launch.py
1. Make sure you followed the Prerequisites and you are inside the Isaac ROS Docker container.
Install the required Debian packages:
sudo apt update
sudo apt-get install -y ros-humble-nova-developer-kit-bringup
source /opt/ros/humble/setup.bash
3. Declare
ROS_DOMAIN_IDwith the same unique ID (number between 0 and 101) on every bash instance inside the Docker container:export ROS_DOMAIN_ID=<unique ID>
Run the file:
ros2 launch nova_developer_kit_bringup sensors.launch.py1. Make sure you followed the Prerequisites and you are inside the Isaac ROS Docker container.
Use
rosdepto install the package’s dependencies:sudo apt update rosdep update rosdep install -i -r --from-paths ${ISAAC_ROS_WS}/src/nova_developer_kit/nova_developer_kit_bringup/ \ --rosdistro humble -y
Build the ROS package in the Docker container:
colcon build --symlink-install --packages-up-to nova_developer_kit_bringup  --packages-skip isaac_ros_ess_models_install isaac_ros_peoplesemseg_models_install
source install/setup.bash
4. Declare
ROS_DOMAIN_IDwith the same unique ID (number between 0 and 101) on every bash instance inside the Docker container:export ROS_DOMAIN_ID=<unique ID>
Run the file:
ros2 launch nova_developer_kit_bringup sensors.launch.py
Visualizing the Sensor Outputs
Make sure you complete Visualization Setup.
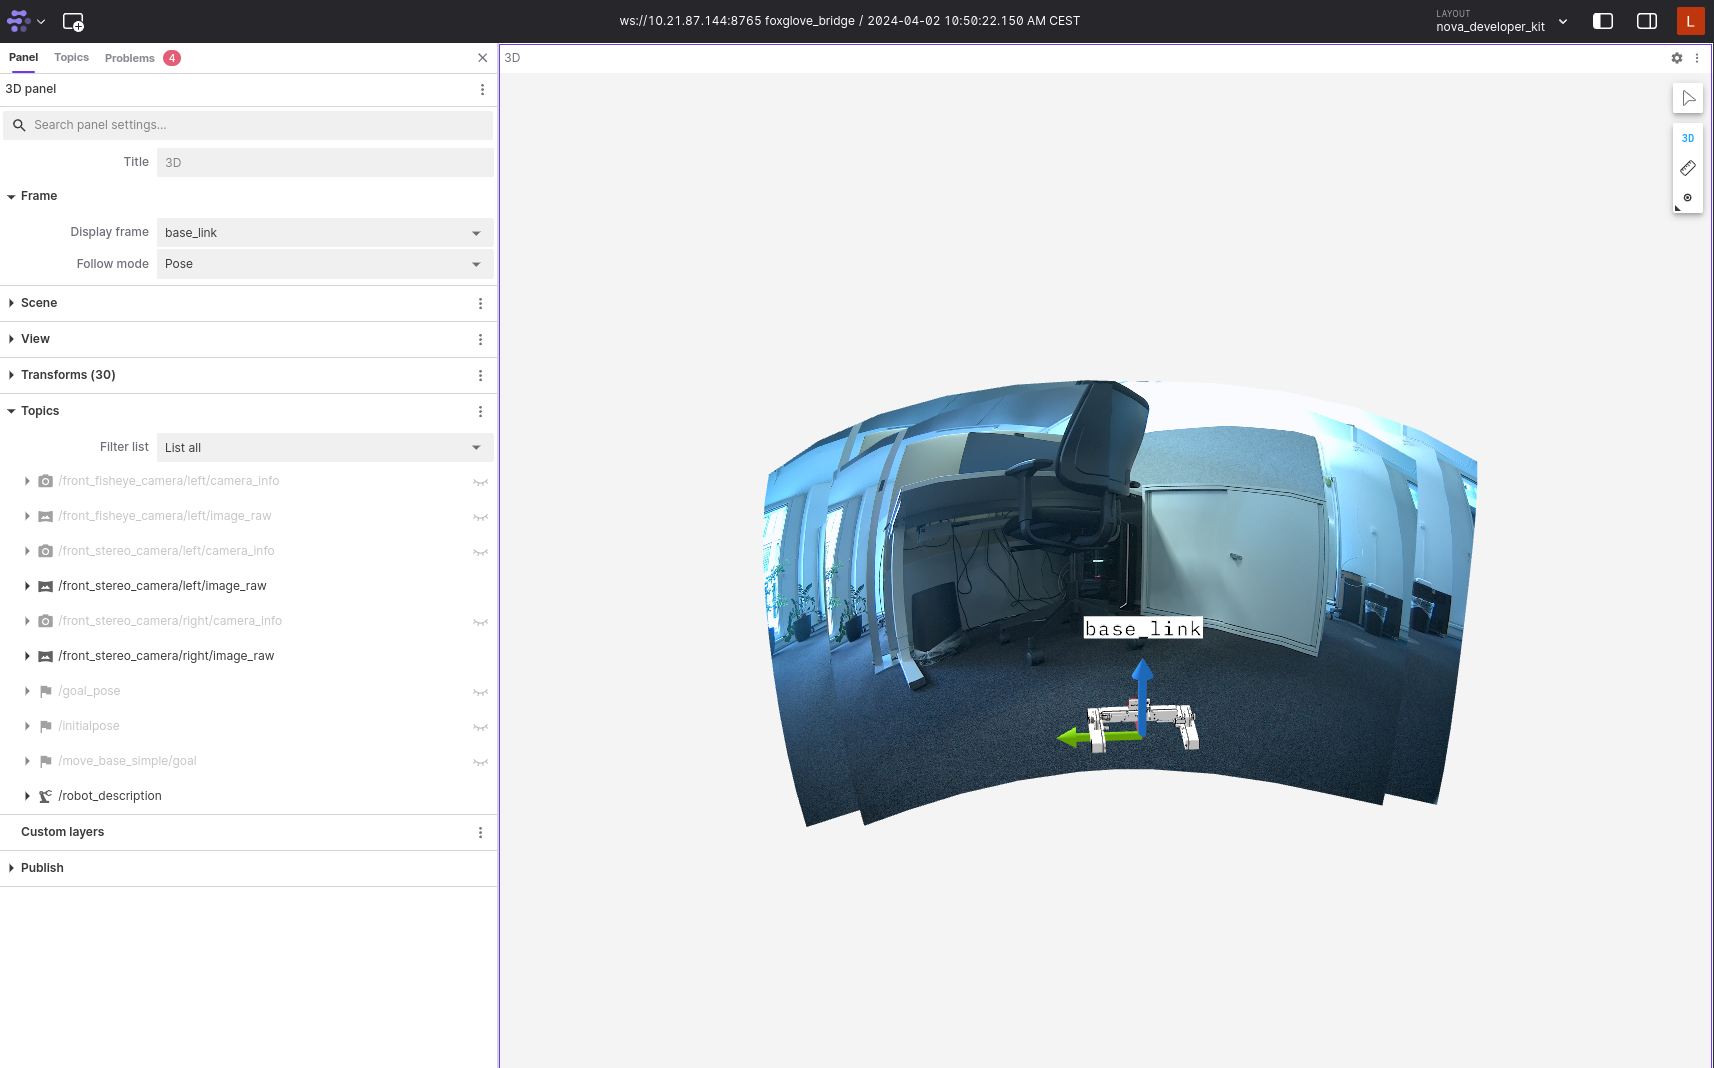
In Foxglove open the
nova_developer_kit_sensors.jsonlayout file downloaded in the previous step.Validate that you can see a visualization of the dev kit and the enabled sensors. Per default, only the front stereo camera is enabled. You are encouraged not to stay too close to cameras. Verify that you receive a visualization similar to the following:
Note
The example streams the camera images in their full resolution to Foxglove. This requires a substantial amount of bandwidth and is only done here for exemplary purposes. Most likely the image stream will be fairly choppy due to the large bandwidth. For a better visualization experience, we recommend that you only visualize resized images or h264 streams.
Note
The fisheye cameras use the equidistant distortion model which is not
yet supported in Foxglove. For this reason, it is not possible to visualize a
fisheye camera in the 3D panel in Foxglove. You can however add an
additional Image panel and use this to visualize the fisheye camera. In
the Image panel’s settings set Topic to the fisheye camera’s image
topic and set Calibration to None.
Enabling More Sensors
By default, as specified in the launch file sensors.launch.py, only the front
stereo camera and front fisheye camera are enabled.
You can, however, pass additional launch arguments to enable more sensors.
To see all available launch arguments use the --show-args argument, for example:
ros2 launch nova_developer_kit_bringup sensors.launch.py --show-args
You can run this command directly on host or just append it to your docker
run command from above.
You can enable more stereo or fisheye cameras with the launch arguments
enabled_stereo_cameras and enabled_fisheye_cameras.
For example to enable all stereo cameras you could run the following launch command:
ros2 launch nova_developer_kit_bringup sensors.launch.py \
    enabled_stereo_cameras:=front_stereo_camera,left_stereo_camera,right_stereo_camera
In the same fashion, you can also enable the fisheye cameras.
ros2 launch nova_developer_kit_bringup sensors.launch.py \
    enabled_fisheye_cameras:=front_fisheye_camera,left_fisheye_camera,right_fisheye_camera
To visualize the sensors in Foxglove follow the same setup as before.
Note
Streaming higher bandwidth data to Foxglove causes higher latency. You can choose an appropriate value for the send_buffer_limit parameter in Foxglove bridge to control latency vs. high bandwidth data visualization.