Tutorial: Autonomous Navigation with Isaac Perceptor and Nav2 on the Nova Carter
This tutorial enables you to run autonomous navigation with the Nova Carter robot.
The tutorial uses the Isaac Perceptor stack for local camera-based 3D perception,
AMCL for Lidar localization and Nav2 for navigation.
For this tutorial, it is assumed that you have successfully completed the
perceptor tutorial.
The PATH_TO_MAP_FOLDER specifies the path to the output map directory generated
by the map creation step. In this setup, cuVSLAM first localizes within the
existing map using the pose hint provided by cuVGL. Once localization is successful,
the pose output from cuVSLAM can be used for navigation.
Note
Some users have reported sporadic WiFi connection issues and the robot
sometimes not responding to goal poses when using the pre-built Docker
images. We are actively working on improving these issues.
You can configure the following modules in the navigation app with these options:
Localization: by default, AMCL localization uses 3D Lidar.
To use visual localization, set the option enable_visual_localization:=True and provide both the visual global localization map and the cuVSLAM map. Enabling visual localization will automatically enable visual odometry and disable wheel odometry.
To use AMCL localization with 2D Lidar, set enable_3d_lidar_localization:=False.
Odometry: wheel odometry is enabled by default.
To use visual odometry, set enable_wheel_odometry:=False.
Costmap layers: the default configuration includes a 2D Lidar costmap and Nvblox costmap.
To add a 3D Lidar costmap layer, set enable_3d_lidar_costmap:=True.
Navigation is only possible when stereo_camera_configuration is set to front_configuration or
front_left_right_configuration or no_cameras (for lidar only setup) options.
Open Foxglove Studio on your remote machine.
Open the nova_carter_navigation.json layout file downloaded in the previous step.
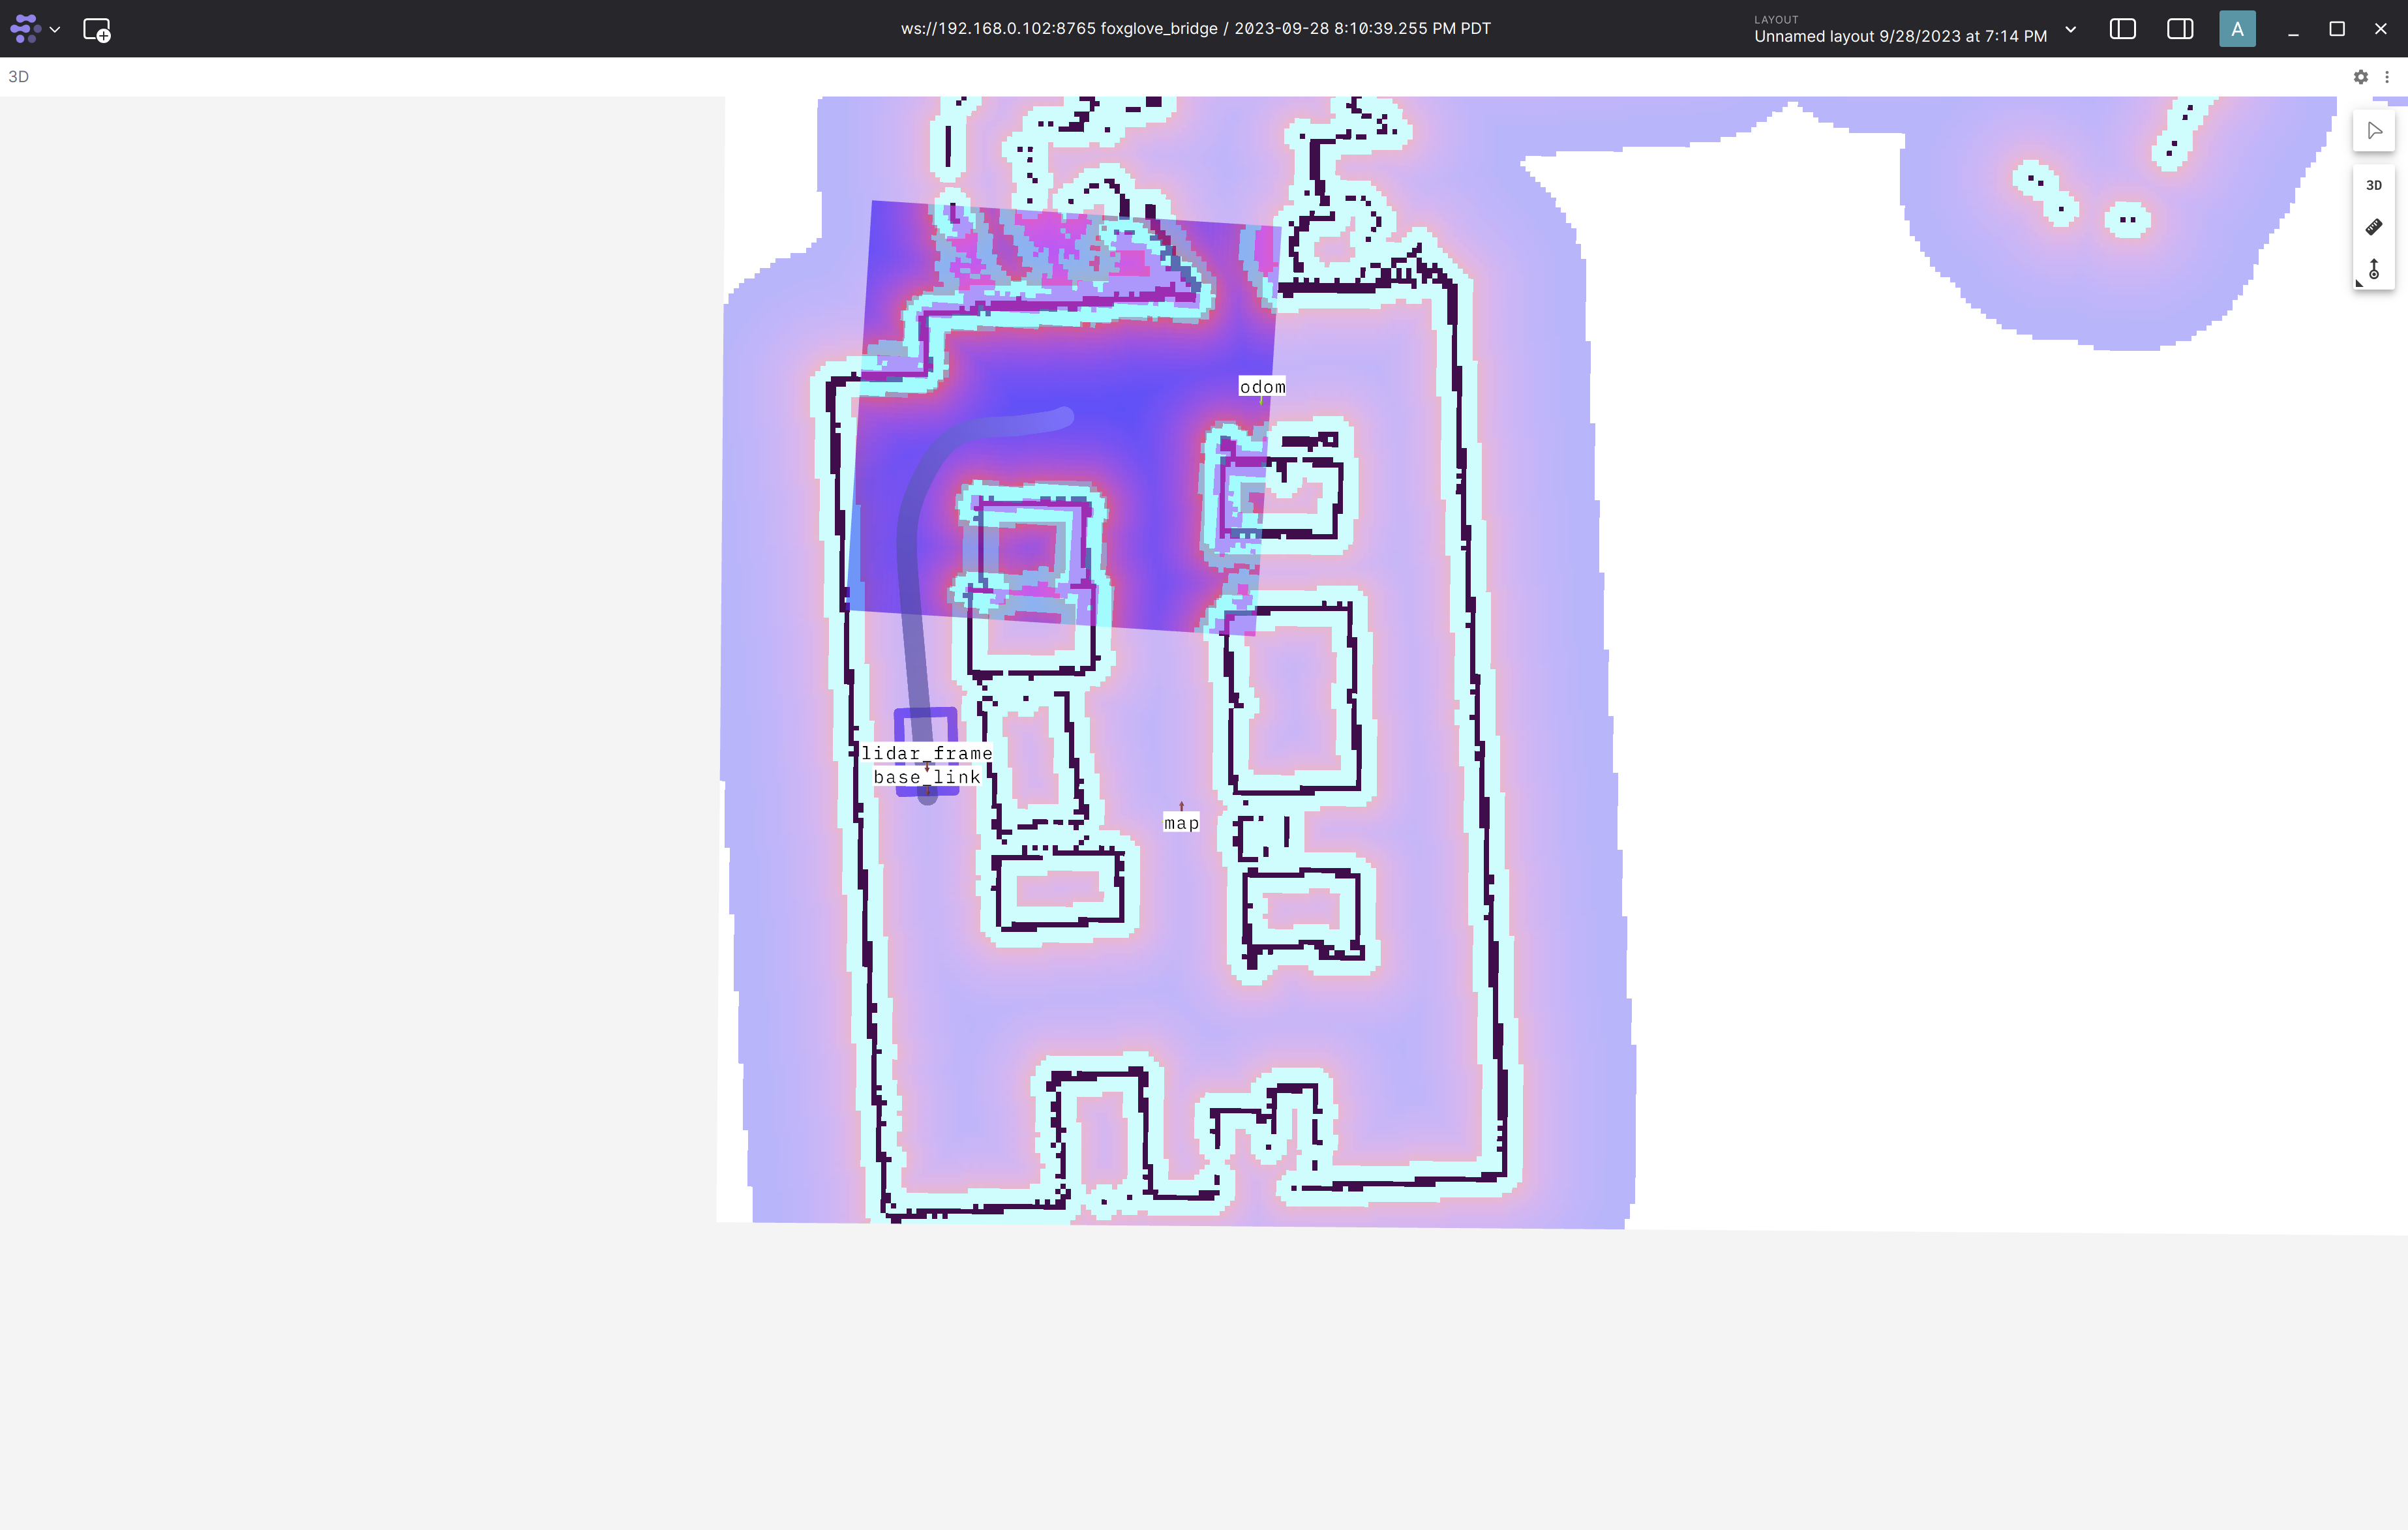
Validate that you can see a visualization of the map, local costmap, and
footprint of the robot. Verify that you see a visualization similar to the
following:
Note
By default, the costmap layers are use the pessimistic nvblox costmap locally and
optimistic one globally. The pessimistic costmap marks all “unknown” cells as obstructed
so that the robot is locally more risk averse.
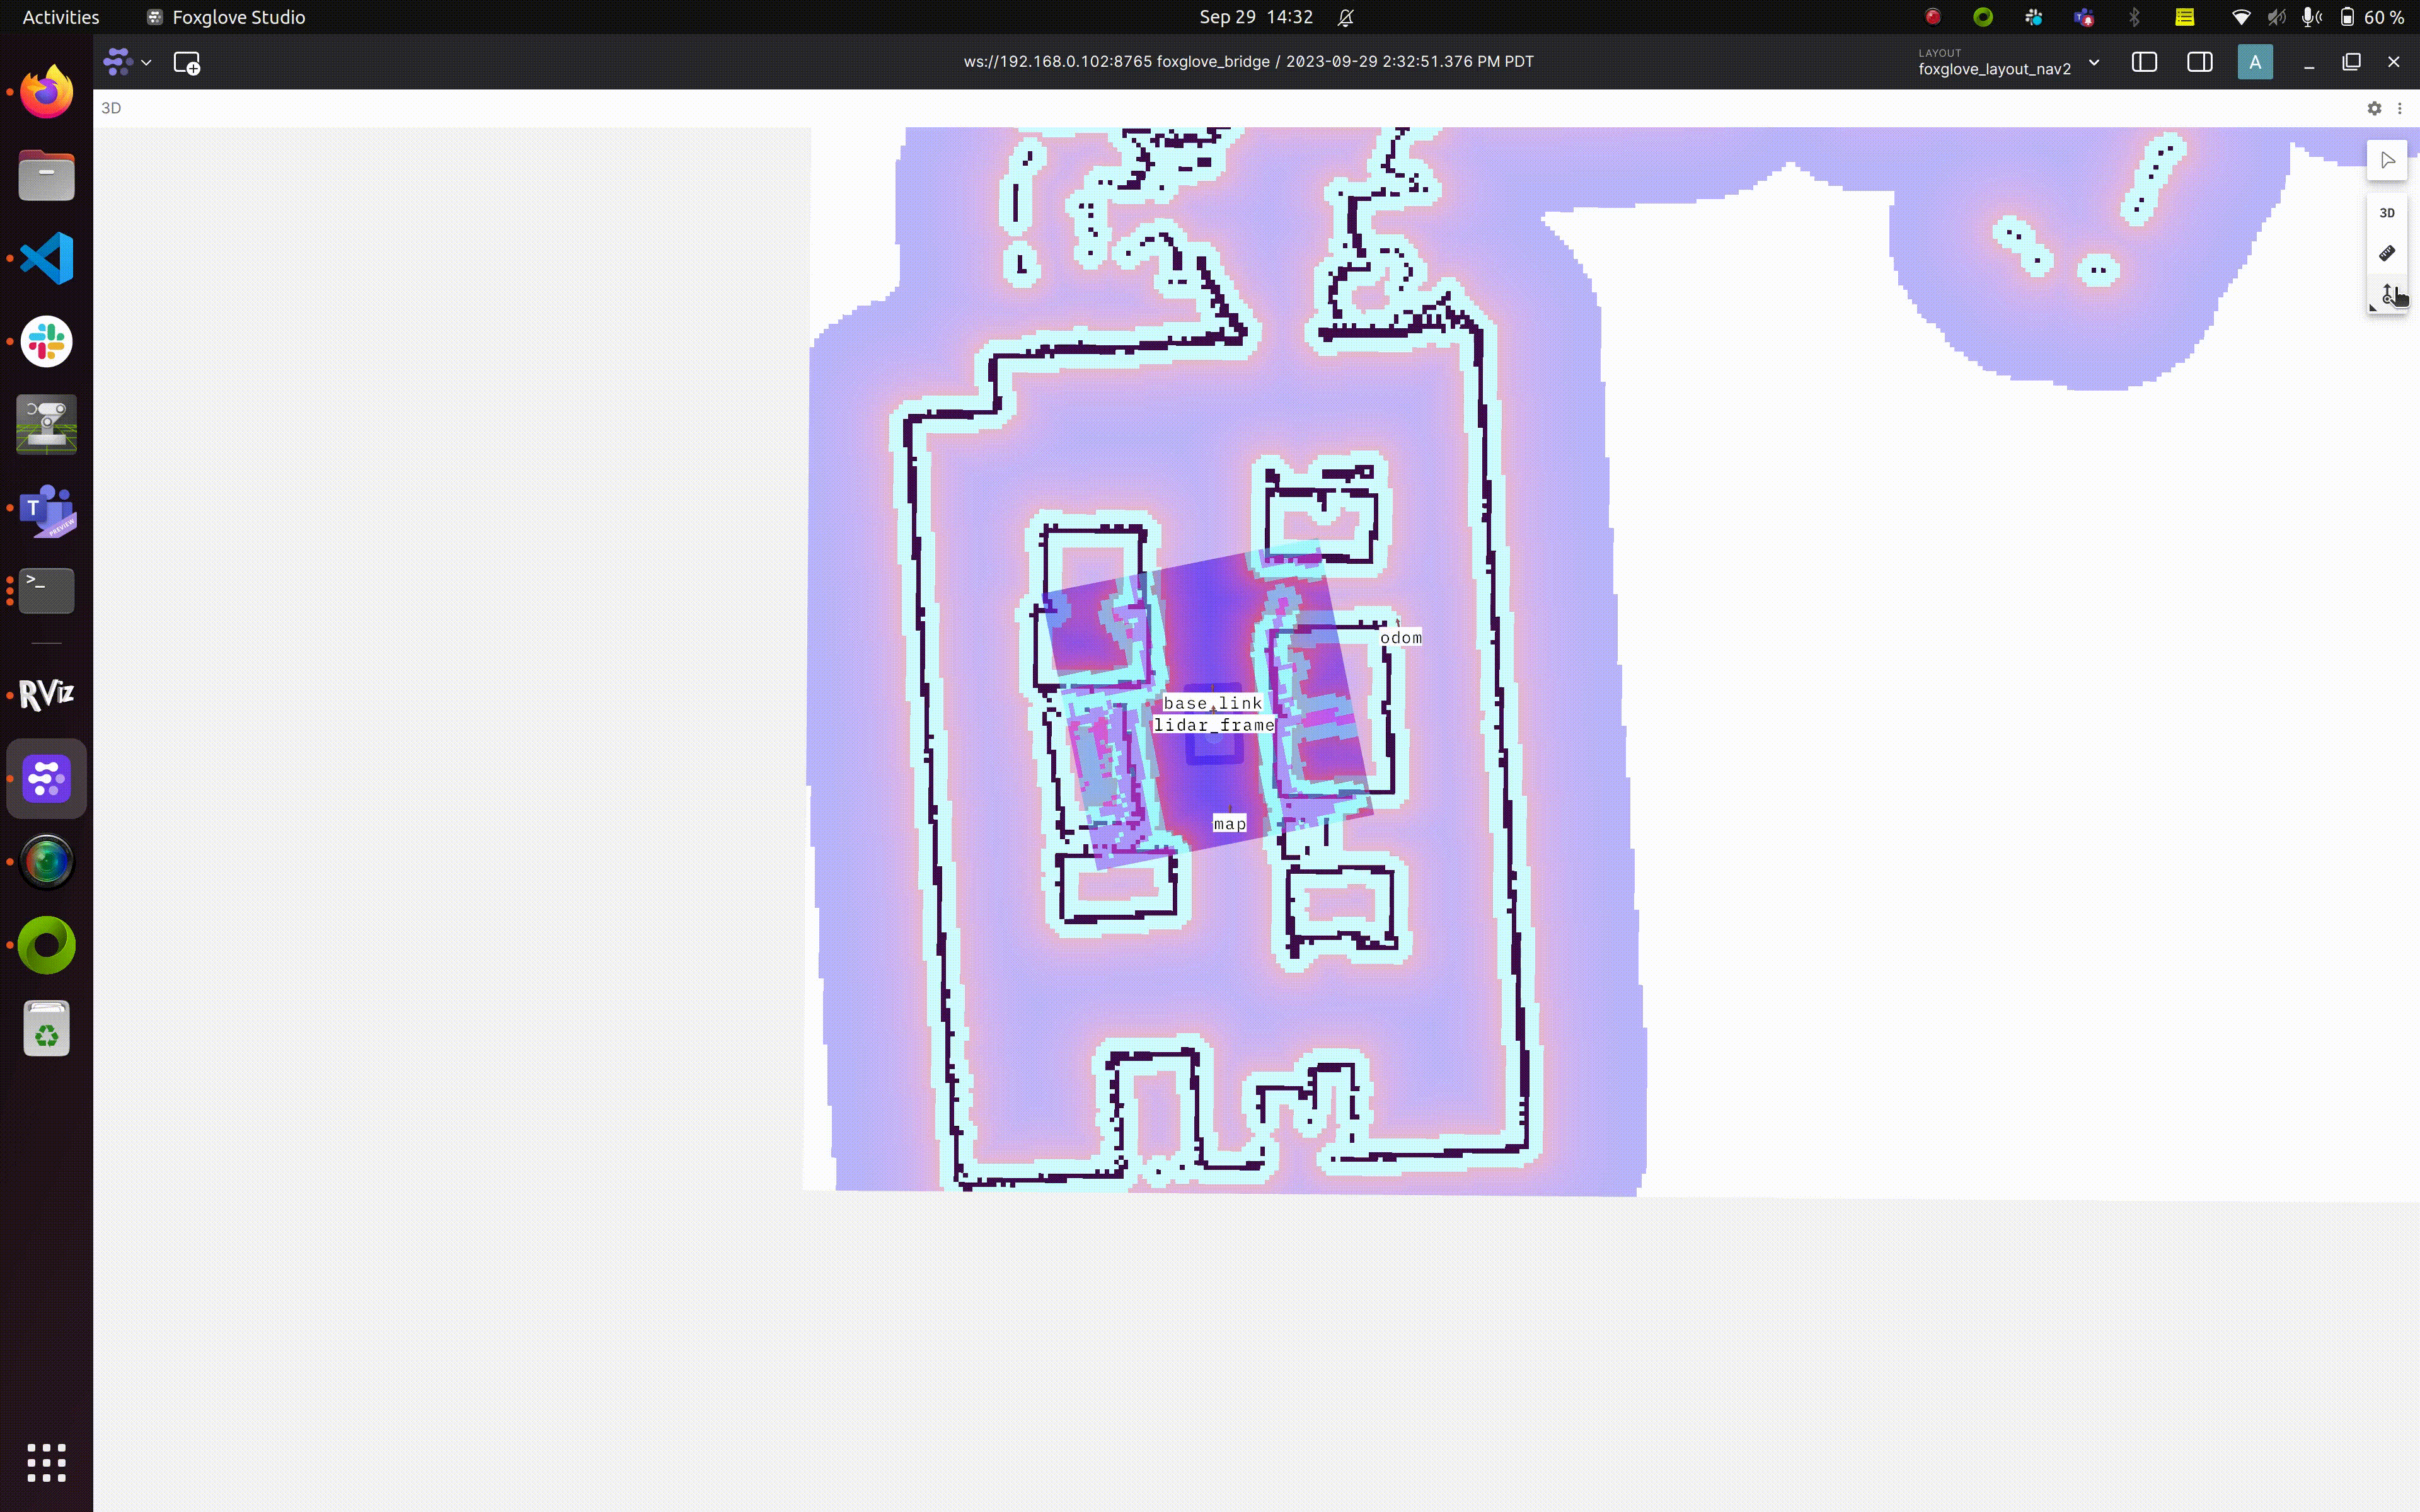
You can send a goal pose setpoint to Nav2 using the
pose publish button
in Foxglove as shown below:
Note
It is important to ensure that the Foxglove “Display frame” in the
3D panel is set
to “map” before sending the goals. If goals are sent and the robot does not
move, it is best to check first that the correct “Display frame” has been
set.
Note
You can also use the joystick to override Nav2 autonomous control at any point.
If you use visual localization for navigation, refer to the visualization section in this
Quickstart
tutorial to view the localization result.
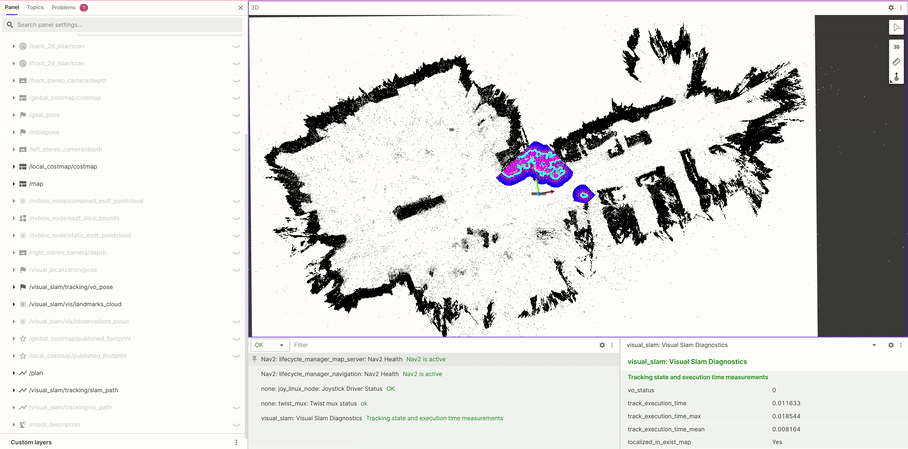
After the robot is successfully localized, you’ll see a visualization similar to the following:
The video begins by displaying the local costmap, then transitions to the global costmap.