isaac_ros_bi3d_freespace
Source code on GitHub.
Quickstart
Set Up Development Environment
Set up your development environment by following the instructions in getting started.
Clone
isaac_ros_commonunder${ISAAC_ROS_WS}/src.cd ${ISAAC_ROS_WS}/src && \ git clone -b release-3.2 https://github.com/NVIDIA-ISAAC-ROS/isaac_ros_common.git isaac_ros_common
(Optional) Install dependencies for any sensors you want to use by following the sensor-specific guides.
Note
We strongly recommend installing all sensor dependencies before starting any quickstarts. Some sensor dependencies require restarting the Isaac ROS Dev container during installation, which will interrupt the quickstart process.
Download Quickstart Assets
Download quickstart data from NGC:
Make sure required libraries are installed.
sudo apt-get install -y curl jq tar
Then, run these commands to download the asset from NGC:
NGC_ORG="nvidia"
NGC_TEAM="isaac"
PACKAGE_NAME="isaac_ros_bi3d_freespace"
NGC_RESOURCE="isaac_ros_bi3d_freespace_assets"
NGC_FILENAME="quickstart.tar.gz"
MAJOR_VERSION=3
MINOR_VERSION=2
VERSION_REQ_URL="https://catalog.ngc.nvidia.com/api/resources/versions?orgName=$NGC_ORG&teamName=$NGC_TEAM&name=$NGC_RESOURCE&isPublic=true&pageNumber=0&pageSize=100&sortOrder=CREATED_DATE_DESC"
AVAILABLE_VERSIONS=$(curl -s \
    -H "Accept: application/json" "$VERSION_REQ_URL")
LATEST_VERSION_ID=$(echo $AVAILABLE_VERSIONS | jq -r "
    .recipeVersions[]
    | .versionId as \$v
    | \$v | select(test(\"^\\\\d+\\\\.\\\\d+\\\\.\\\\d+$\"))
    | split(\".\") | {major: .[0]|tonumber, minor: .[1]|tonumber, patch: .[2]|tonumber}
    | select(.major == $MAJOR_VERSION and .minor <= $MINOR_VERSION)
    | \$v
    " | sort -V | tail -n 1
)
if [ -z "$LATEST_VERSION_ID" ]; then
    echo "No corresponding version found for Isaac ROS $MAJOR_VERSION.$MINOR_VERSION"
    echo "Found versions:"
    echo $AVAILABLE_VERSIONS | jq -r '.recipeVersions[].versionId'
else
    mkdir -p ${ISAAC_ROS_WS}/isaac_ros_assets && \
    FILE_REQ_URL="https://api.ngc.nvidia.com/v2/resources/$NGC_ORG/$NGC_TEAM/$NGC_RESOURCE/\
versions/$LATEST_VERSION_ID/files/$NGC_FILENAME" && \
    curl -LO --request GET "${FILE_REQ_URL}" && \
    tar -xf ${NGC_FILENAME} -C ${ISAAC_ROS_WS}/isaac_ros_assets && \
    rm ${NGC_FILENAME}
fi
Download a pre-trained Bi3D model:
mkdir -p ${ISAAC_ROS_WS}/isaac_ros_assets/models/bi3d_proximity_segmentation && \
cd ${ISAAC_ROS_WS}/isaac_ros_assets/models/bi3d_proximity_segmentation && \
wget 'https://api.ngc.nvidia.com/v2/models/nvidia/isaac/bi3d_proximity_segmentation/versions/2.0.0/files/featnet.onnx' &&
wget 'https://api.ngc.nvidia.com/v2/models/nvidia/isaac/bi3d_proximity_segmentation/versions/2.0.0/files/segnet.onnx'
Build isaac_ros_bi3d_freespace
Launch the Docker container using the
run_dev.shscript:cd ${ISAAC_ROS_WS}/src/isaac_ros_common && \ ./scripts/run_dev.sh
Install the prebuilt Debian package:
sudo apt-get update
sudo apt-get install -y ros-humble-isaac-ros-bi3d-freespace
Clone this repository under
${ISAAC_ROS_WS}/src:cd ${ISAAC_ROS_WS}/src && \ git clone -b release-3.2 https://github.com/NVIDIA-ISAAC-ROS/isaac_ros_freespace_segmentation.git isaac_ros_freespace_segmentation
Launch the Docker container using the
run_dev.shscript:cd ${ISAAC_ROS_WS}/src/isaac_ros_common && \ ./scripts/run_dev.sh
Use
rosdepto install the package’s dependencies:sudo apt-get update
rosdep update && rosdep install --from-paths ${ISAAC_ROS_WS}/src/isaac_ros_freespace_segmentation/isaac_ros_bi3d_freespace --ignore-src -y
Build the package from source:
cd ${ISAAC_ROS_WS} && \ colcon build --symlink-install --packages-up-to isaac_ros_bi3d_freespace --base-paths ${ISAAC_ROS_WS}/src/isaac_ros_freespace_segmentation/isaac_ros_bi3d_freespace
Source the ROS workspace:
Note
Make sure to repeat this step in every terminal created inside the Docker container.
Because this package was built from source, the enclosing workspace must be sourced for ROS to be able to find the package’s contents.
source install/setup.bash
Run Launch File
Convert the
.onnxmodel files to TensorRT engine plan files:/usr/src/tensorrt/bin/trtexec --saveEngine=${ISAAC_ROS_WS}/isaac_ros_assets/models/bi3d_proximity_segmentation/featnet.plan \ --onnx=${ISAAC_ROS_WS}/isaac_ros_assets/models/bi3d_proximity_segmentation/featnet.onnx --int8 && /usr/src/tensorrt/bin/trtexec --saveEngine=${ISAAC_ROS_WS}/isaac_ros_assets/models/bi3d_proximity_segmentation/segnet.plan \ --onnx=${ISAAC_ROS_WS}/isaac_ros_assets/models/bi3d_proximity_segmentation/segnet.onnx --int8
Note
The engine plans generated using the x86_64 commands will also work on Jetson, but performance will be reduced.
On Jetson platforms, generate engine plans with DLA support enabled:
/usr/src/tensorrt/bin/trtexec \ --saveEngine=${ISAAC_ROS_WS}/isaac_ros_assets/models/bi3d_proximity_segmentation/featnet.plan \ --onnx=${ISAAC_ROS_WS}/isaac_ros_assets/models/bi3d_proximity_segmentation/featnet.onnx \ --int8 --useDLACore=0 --allowGPUFallback && /usr/src/tensorrt/bin/trtexec \ --saveEngine=${ISAAC_ROS_WS}/isaac_ros_assets/models/bi3d_proximity_segmentation/segnet.plan \ --onnx=${ISAAC_ROS_WS}/isaac_ros_assets/models/bi3d_proximity_segmentation/segnet.onnx \ --int8 --useDLACore=0 --allowGPUFallback
Continuing inside the Docker container, install the following dependencies:
sudo apt-get update
sudo apt-get install -y ros-humble-isaac-ros-examples ros-humble-isaac-ros-bi3d
Run the following launch file to spin up a demo of this package using the quickstart rosbag:
ros2 launch isaac_ros_examples isaac_ros_examples.launch.py \ launch_fragments:=bi3d,bi3d_freespace \ interface_specs_file:=${ISAAC_ROS_WS}/isaac_ros_assets/isaac_ros_bi3d_freespace/rosbag_quickstart_interface_specs.json \ featnet_engine_file_path:=${ISAAC_ROS_WS}/isaac_ros_assets/models/bi3d_proximity_segmentation/featnet.plan \ segnet_engine_file_path:=${ISAAC_ROS_WS}/isaac_ros_assets/models/bi3d_proximity_segmentation/segnet.plan \ max_disparity_values:=10
Open a second terminal inside the Docker container:
cd ${ISAAC_ROS_WS}/src/isaac_ros_common && \
./scripts/run_dev.sh
Run the rosbag file to simulate image streams:
ros2 bag play -l ${ISAAC_ROS_WS}/isaac_ros_assets/isaac_ros_bi3d_freespace/quickstart.bag
Ensure that you have already set up your RealSense camera using the RealSense setup tutorial. If you have not, please set up the sensor and then restart this quickstart from the beginning.
Continuing inside the Docker container, install the following dependencies:
sudo apt-get update
sudo apt-get install -y ros-humble-isaac-ros-examples ros-humble-isaac-ros-realsense ros-humble-isaac-ros-bi3d
Run the following launch file to spin up a demo of this package using a RealSense camera:
Note
This package requires a known transform between the camera optical frame and the base link frame. The base link frame defines the plane that the freespace segmentation will be projected onto; it can be thought of as the ground plane.
The following command sets the launch argument
publish_default_tf:=true, which will publish a default transform positioning the camera 30 centimeters above the base link frame, with the optical Z axis pointing straight forward.Position the physical camera to match this default or set
publish_default_tf:=false. Then publish your own transform between the camera optical frame and the base link frame.ros2 launch isaac_ros_examples isaac_ros_examples.launch.py \ launch_fragments:=realsense_stereo_rect,bi3d,bi3d_freespace \ interface_specs_file:=${ISAAC_ROS_WS}/isaac_ros_assets/isaac_ros_bi3d_freespace/realsense_quickstart_interface_specs.json \ featnet_engine_file_path:=${ISAAC_ROS_WS}/isaac_ros_assets/models/bi3d_proximity_segmentation/featnet.plan \ segnet_engine_file_path:=${ISAAC_ROS_WS}/isaac_ros_assets/models/bi3d_proximity_segmentation/segnet.plan \ max_disparity_values:=10 publish_default_tf:=true
Ensure that you have already set up your Hawk camera using the Hawk setup tutorial. If you have not, please set up the sensor and then restart this quickstart from the beginning.
Continuing inside the Docker container, install the following dependencies:
sudo apt-get update
sudo apt-get install -y ros-humble-isaac-ros-examples ros-humble-isaac-ros-argus-camera ros-humble-isaac-ros-image-proc ros-humble-isaac-ros-bi3d
Run the following launch file to spin up a demo of this package using a Hawk camera:
Note
This package requires a known transform between the camera optical frame and the base link frame. The base link frame defines the plane that the freespace segmentation will be projected onto; it can be thought of as the ground plane.
The following command sets the launch argument
publish_default_tf:=true, which will publish a default transform positioning the camera 30 centimeters above the base link frame, with the optical Z axis pointing straight forward.Position the physical camera to match this default or set
publish_default_tf:=false. Then publish your own transform between the camera optical frame and the base link frame.ros2 launch isaac_ros_examples isaac_ros_examples.launch.py \ launch_fragments:=argus_stereo,resize_rectify_stereo,bi3d,bi3d_freespace \ interface_specs_file:=${ISAAC_ROS_WS}/isaac_ros_assets/isaac_ros_bi3d_freespace/hawk_quickstart_interface_specs.json \ featnet_engine_file_path:=${ISAAC_ROS_WS}/isaac_ros_assets/models/bi3d_proximity_segmentation/featnet.plan \ segnet_engine_file_path:=${ISAAC_ROS_WS}/isaac_ros_assets/models/bi3d_proximity_segmentation/segnet.plan \ max_disparity_values:=10 publish_default_tf:=true
Ensure that you have already set up your ZED camera using ZED setup tutorial.
Continuing inside the Docker container, install dependencies:
sudo apt-get update
sudo apt-get install -y ros-humble-isaac-ros-examples ros-humble-isaac-ros-image-proc ros-humble-isaac-ros-bi3d ros-humble-isaac-ros-zed
Run the following launch file to spin up a demo of this package using a ZED Camera:
Note
This package requires a known transform between the camera optical frame and the base link frame. The base link frame defines the plane that the freespace segmentation will be projected onto; it can be thought of as the ground plane.
The following command launches a static publisher in the
zed_stereo_rectlaunch fragment with a default transform positioning the camera 10 centimeters above the base link frame, with the optical Z axis pointing straight forward.ros2 launch isaac_ros_examples isaac_ros_examples.launch.py \ launch_fragments:=zed_stereo_rect,bi3d,bi3d_freespace \ featnet_engine_file_path:=${ISAAC_ROS_WS}/isaac_ros_assets/models/bi3d_proximity_segmentation/featnet.plan \ segnet_engine_file_path:=${ISAAC_ROS_WS}/isaac_ros_assets/models/bi3d_proximity_segmentation/segnet.plan \ max_disparity_values:=10 \ interface_specs_file:=${ISAAC_ROS_WS}/isaac_ros_assets/isaac_ros_bi3d_freespace/zed2_quickstart_interface_specs.json
Note
If you are using the ZED X series, replace zed2_quickstart_interface_specs.json with zedx_quickstart_interface_specs.json in the above command.
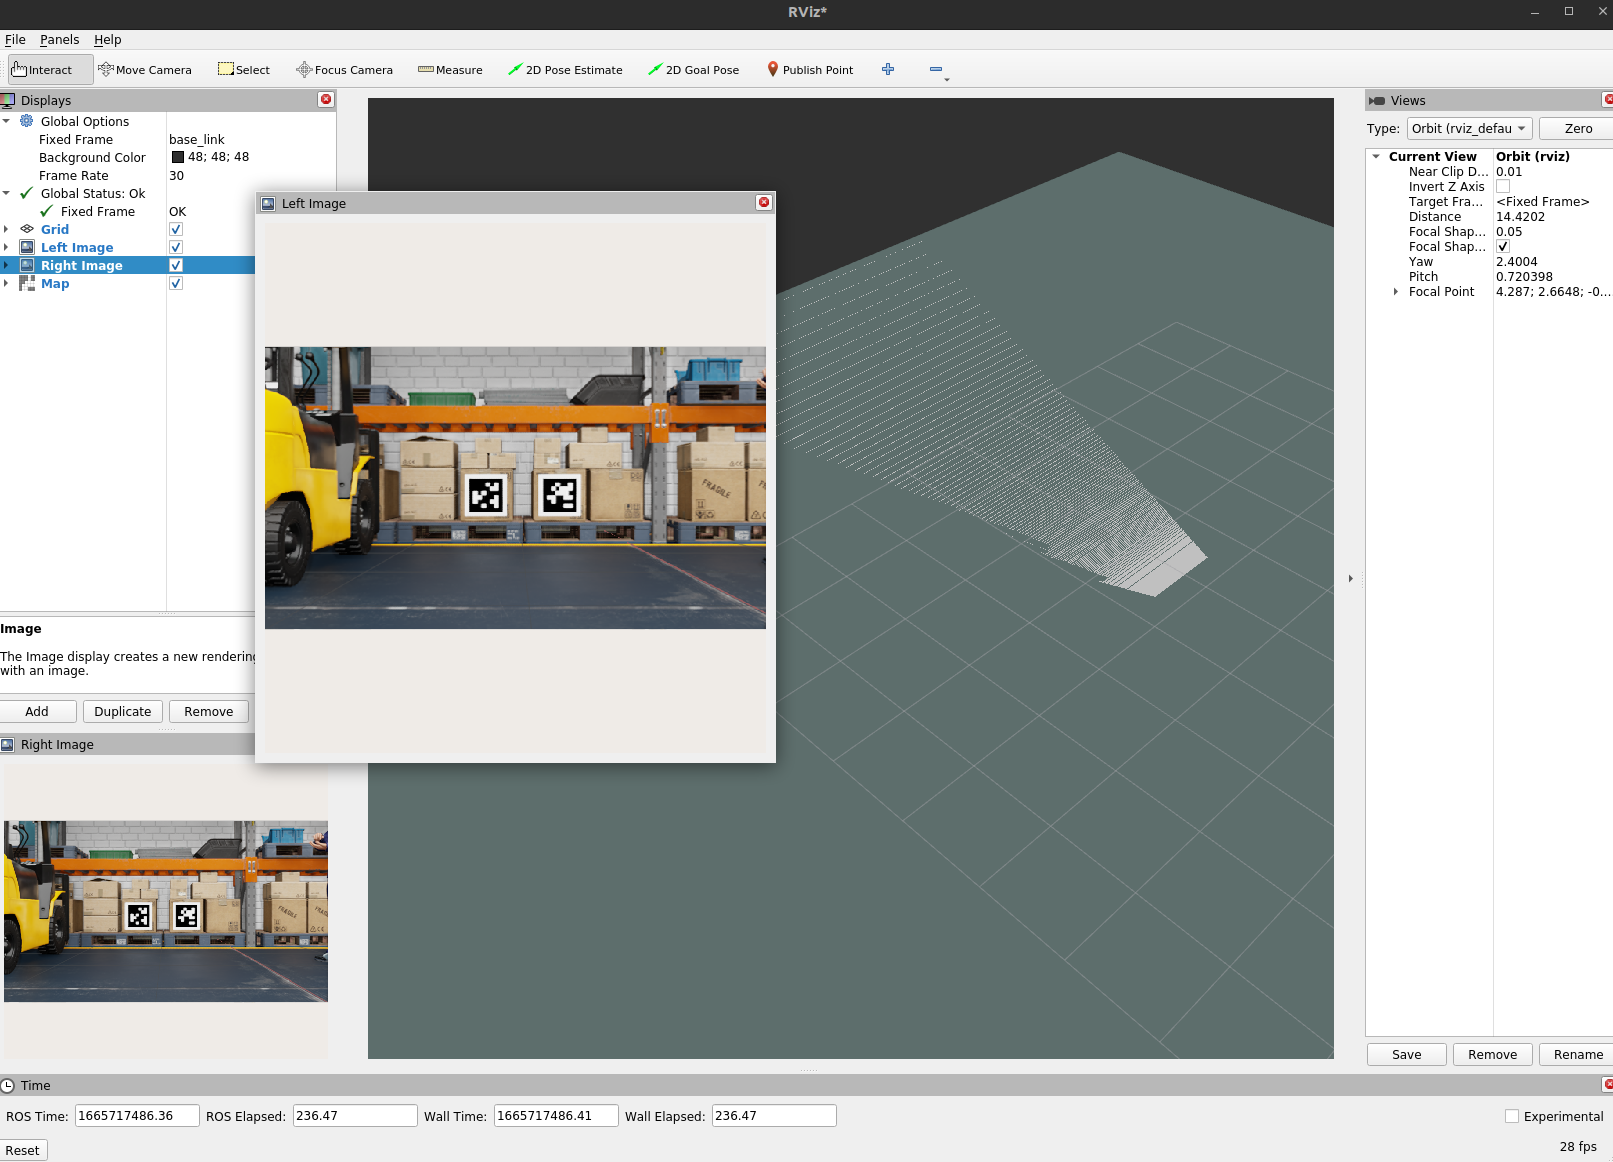
Visualize Results
Open a new terminal inside the Docker container:
cd ${ISAAC_ROS_WS}/src/isaac_ros_common && \
./scripts/run_dev.sh
Visualize the occupancy grid in RViz.
Start RViz:
rviz2
In the left pane, change Fixed Frame to
base_link.In the left pane, click the Add button, then select By topic followed by Map to add the occupancy grid.
Try More Examples
To continue your exploration, check out the following suggested examples:
API
Usage
ros2 launch isaac_ros_bi3d_freespace isaac_ros_freespace_segmentation.launch.py base_link_frame:=<"name of base link"> camera_frame:=<"name of camera frame"> f_x:=<"focal length in pixels in x dimension"> f_y:=<"focal length in pixels in y dimension"> grid_width:=<"desired grid width"> grid_height:=<"desired grid height"> grid_resolution:=<"desired grid resolution">
ROS Parameters
ROS Parameter |
Type |
Default |
Description |
|---|---|---|---|
|
|
|
The name of the |
|
|
|
The name of the |
|
|
|
The focal length in pixels in x dimension |
|
|
|
The focal length in pixels in y dimension |
|
|
|
The width of the output occupancy grid, in number of cells |
|
|
|
The height of the output occupancy grid, in number of cells |
|
|
|
The resolution of the output occupancy grid, in meters per cell |
ROS Topics Subscribed
ROS Topic |
Interface |
Description |
|---|---|---|
|
The input disparity image, with pixels corresponding to ground labeled as 0 |
Warning
Limitation: For all input images, both the height and width must be an even number of pixels.
ROS Topics Published
ROS Topic |
Interface |
Description |
|---|---|---|
|
The output occupancy grid, with cells marked as 0 if free |