Tutorial for Multi-Object Pick and Place using cuMotion with Perception#
Overview#
This tutorial walks through running the multi-object Pick and Place workflow on your robot. The Pick and Place reference workflow has been tested on NVIDIA® Jetson Thor™ (128 GB).
What You’ll Be Doing:
Configure the orchestration system for your objects and workspace
Launch perception and motion planning nodes
Execute autonomous Pick and Place operations
Monitor workflow execution with behavior tree visualization
Note
For conceptual understanding and more details, refer to:
Multi-Object Pick and Place - Workflow concepts
isaac_ros_manipulation_pick_and_place - Package details and quickstart
Configuration Guide - Detailed configuration
Tutorial Steps#
Follow the setup instructions in Setup Hardware and Software for Real Robot with Isaac ROS Manipulation.
Object Requirements#
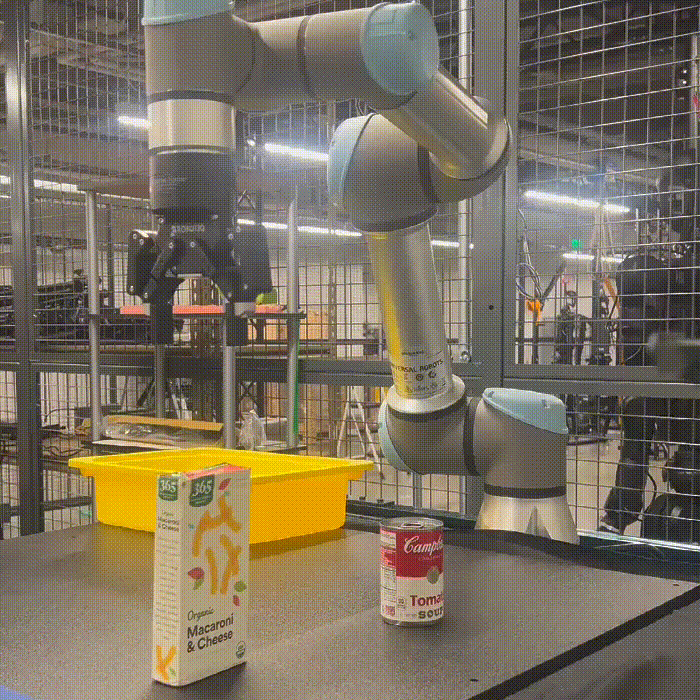
Ensure that you have one of the NGC catalog objects that can be grasped, for example sdetr_grasp. This tutorial uses the Mac and Cheese Box and the Soup Can.
If you are using FoundationPose, for the desired object, ensure that you have a mesh and a texture file available for it.
To prepare an object, review FoundationPose documentation.
Configure Your Workflow#
Prepare Configuration Files and Environment Variables#
Before editing any configuration files, copy them to the appropriate location and set up environment variables based on your installation method. This section handles all configuration file preparation (workflow config, behavior tree parameters, and blackboard parameters) and sets up environment variables for simplified command usage.
Binary installations have read-only configuration files in system directories. Copy all necessary files to a writable location:
# Create a directory for your custom configuration
mkdir -p ${ISAAC_ROS_WS}/isaac_ros_manipulation_config
Copy the workflow configuration file for your robot:
cp $(ros2 pkg prefix --share isaac_ros_manipulation_bringup)/params/ur5e_robotiq_85_mac_and_cheese.yaml \
   ${ISAAC_ROS_WS}/isaac_ros_manipulation_config/my_robot_config.yaml
cp $(ros2 pkg prefix --share isaac_ros_manipulation_bringup)/params/ur10e_robotiq_2f_140_mac_and_cheese.yaml \
   ${ISAAC_ROS_WS}/isaac_ros_manipulation_config/my_robot_config.yaml
Copy behavior tree and blackboard parameter files:
cp $(ros2 pkg prefix --share isaac_ros_manipulation_pick_and_place)/params/multi_object_pick_and_place_behavior_tree_params.yaml \
   ${ISAAC_ROS_WS}/isaac_ros_manipulation_config/multi_object_pick_and_place_behavior_tree_params.yaml

cp $(ros2 pkg prefix --share isaac_ros_manipulation_pick_and_place)/params/multi_object_pick_and_place_blackboard_params.yaml \
   ${ISAAC_ROS_WS}/isaac_ros_manipulation_config/multi_object_pick_and_place_blackboard_params.yaml
Files you’ll edit:
Workflow configuration:
${ISAAC_ROS_WS}/isaac_ros_manipulation_config/my_robot_config.yaml
Behavior tree parameters:
${ISAAC_ROS_WS}/isaac_ros_manipulation_config/multi_object_pick_and_place_behavior_tree_params.yaml
Blackboard parameters:
${ISAAC_ROS_WS}/isaac_ros_manipulation_config/multi_object_pick_and_place_blackboard_params.yaml
Set up environment variables:
# Point to the directory containing your configuration files
export ISAAC_ROS_MANIPULATION_WORKFLOW_CONFIG_DIR="${ISAAC_ROS_WS}/isaac_ros_manipulation_config"
export ISAAC_ROS_MANIPULATION_PICK_AND_PLACE_CONFIG_DIR="${ISAAC_ROS_WS}/isaac_ros_manipulation_config"
When building from source with --symlink-install, you can edit configuration files directly in the source directories.
Files you’ll edit:
Workflow configuration:
${ISAAC_ROS_WS}/src/isaac_ros_manipulation/isaac_ros_manipulation_bringup/params/ur5e_robotiq_85_mac_and_cheese.yaml
${ISAAC_ROS_WS}/src/isaac_ros_manipulation/isaac_ros_manipulation_bringup/params/ur10e_robotiq_2f_140_mac_and_cheese.yaml
Behavior tree parameters:
${ISAAC_ROS_WS}/src/isaac_ros_manipulation/isaac_ros_manipulation_pick_and_place/params/multi_object_pick_and_place_behavior_tree_params.yaml
Blackboard parameters:
${ISAAC_ROS_WS}/src/isaac_ros_manipulation/isaac_ros_manipulation_pick_and_place/params/multi_object_pick_and_place_blackboard_params.yaml
Set up environment variables:
# Point to the source directories containing the configuration files
export ISAAC_ROS_MANIPULATION_WORKFLOW_CONFIG_DIR="${ISAAC_ROS_WS}/src/isaac_ros_manipulation/isaac_ros_manipulation_bringup/params"
export ISAAC_ROS_MANIPULATION_PICK_AND_PLACE_CONFIG_DIR="${ISAAC_ROS_WS}/src/isaac_ros_manipulation/isaac_ros_manipulation_pick_and_place/params"
Edit Workflow Configuration File#
Edit the workflow configuration file to set your robot and camera configuration.
Reference documentation:
Set
workflow_type: PICK_AND_PLACEand configure yourcamera_type:Set
camera_typetoREALSENSEin your configuration file.Important
Verify depth configuration. The sample configuration files include pre-configured engine file paths for all depth types (
ess_full_engine_file_path,ess_light_engine_file_path,foundationstereo_low_res_engine_file_path,foundationstereo_high_res_engine_file_path). To switch depth models, only thedepth_typeparameter needs to change and the workflow selects the correct engine automatically. Verify that all the required engine paths are valid for your platform during initial setup.Engine File Path Configuration — engine file parameters for each
depth_typeDepth Configuration Compatibility — which depth types are supported for each camera type (RealSense, Isaac Sim)
Supported Model Combinations — valid perception model combinations
Note
For the full configuration reference, refer to the Manipulation Workflow Configuration Guide.
Tip
Foundation Stereo with a Static Planning Scene
Foundation Stereo takes approximately 1.5 seconds per depth frame on Thor (FP32, 576x960); see the Comparing DNNs section. When it is paired with
nvblox, the 3D scene representation can lag the real world by the same amount and is not useful for dynamic collision avoidance. For workspaces that are guaranteed static (a fenced industrial cell, a fixed bench-top test rig), you can replace live 3D reconstruction with a pre-defined MoveIt planning scene:Set
depth_typetoFOUNDATION_STEREO_LOW_RESorFOUNDATION_STEREO_HIGH_RES.Set
enable_nvbloxtofalse.Point
moveit_collision_objects_scene_fileto a.scenefile that captures every workspace obstacle the robot could collide with.
For instructions on creating and exporting a scene file, refer to Workspace Configuration in the Configuration Guide.
Warning
Do not use this configuration in environments where people or objects may enter the workspace. Disabling
nvbloxturns off dynamic collision avoidance, so the robot will only avoid the obstacles listed in the scene file.
Configure Objects and Workspace#
Edit the behavior tree and blackboard parameter files (prepared in Prepare Configuration Files and Environment Variables) to configure the objects your robot will manipulate and define workspace parameters.
Reference documentation:
Note
The example configurations are pre-configured for SyntheticaDETR v1.0.0 with specific class IDs: Mac and Cheese box ('22') and Soup can ('3'). If you’re using a different detection model or objects, you’ll need to update these class IDs to match your model’s output.
For detailed configuration instructions covering object setup, workspace locations, and system parameters, refer to the Pick and Place Configuration Guide.
Configuration Checklist
Verify these settings in your behavior tree and blackboard parameter files before launching:
Objects:
supported_objectsmatch scene objects with correctclass_idsand valid grasp/mesh file pathsWorkspace:
target_posesandhome_poseare safe and reachableMode:
0= single bin,1= multi-bin sortingDrop method: YAML defaults, action goal, or RViz marker correction
System: Action server names and
startup_server_timeout_secmatch your setup
Important
Configuration changes require restarting the orchestration system. The behavior tree loads these parameters at startup and does not dynamically reload configuration files during execution.
Tip
Testing Configuration Without Hardware: If you want to verify your configuration setup before proceeding to hardware, refer to the standalone quickstart in isaac_ros_manipulation_pick_and_place. This uses dummy servers to test that your behavior tree logic and configuration files work correctly.
Important
Set pose_estimation.camera_frame_id in the behavior tree parameters to match your camera_type. Using the wrong value will cause pose estimation failures. See Pose Estimation Frame IDs in the Configuration Guide for the correct value for each camera type.
Note
Run the Driver and Hardware Tests to make sure your robot drivers are in a good state.
Run Pre-Flight Tests (Optional but highly recommended)#
To verify that you have setup the Isaac ROS Manipulation correctly, run the following command:
export ENABLE_MANIPULATOR_TESTING=on_robot
Point to your configuration file:
export ISAAC_ROS_MANIPULATION_TEST_CONFIG=${ISAAC_ROS_MANIPULATION_WORKFLOW_CONFIG_DIR}/my_robot_config.yaml
export ISAAC_ROS_MANIPULATION_TEST_CONFIG=${ISAAC_ROS_MANIPULATION_WORKFLOW_CONFIG_DIR}/ur5e_robotiq_85_mac_and_cheese.yaml
export ISAAC_ROS_MANIPULATION_TEST_CONFIG=${ISAAC_ROS_MANIPULATION_WORKFLOW_CONFIG_DIR}/ur10e_robotiq_2f_140_mac_and_cheese.yaml
Run the tests:
python3 -m pytest ${ISAAC_ROS_WS}/src/isaac_ros_manipulation/isaac_ros_manipulation_bringup/test
Note
You can also use
colcon test --packages-select isaac_ros_manipulation_bringupto run the tests. However,pytesthas a better output and makes it easier to view status and progress of the tests. If these tests fail, refer to Isaac ROS Manipulation Testing Guide for more information. It is recommended to run the tests manually usinglaunch_testand then manually inspecting the results.This will run a series of tests to verify that the Isaac ROS Manipulation is working correctly.
Launch the System#
Set up networking (in each terminal):
export ROS_DOMAIN_ID=<ID_NUMBER> # Avoid network interference
Install Cyclone DDS for more reliable real-time communication with the robot (one-time setup):
sudo apt-get install -y ros-jazzy-rmw-cyclonedds-cpp
Set the Cyclone DDS environment variable (required in every terminal):
export RMW_IMPLEMENTATION=rmw_cyclonedds_cpp
On the UR teach pendant: Load the remote program and ensure that robot is paused or stopped for safety purposes.
(Optional) Open another terminal and launch the behavior tree viewer:
isaac-ros activate
py-trees-tree-viewer
Note
The behavior tree viewer provides real-time visualization of tree structure, node states (
SUCCESS/green,FAILURE/red,RUNNING/blue), blackboard variables (object queue, active object ID, drop poses), and timeline replay for debugging workflow execution.Warning
Running the
py-trees-tree-viewerGUI on Jetson Thor may impact workflow performance due to shared compute and GPU resources. Consider using it for debugging only when needed.Open another terminal and launch the main workflow with your configuration:
isaac-ros activateSource the workspace (required if at least one package was built from source in previous steps):
source install/setup.bash
Launch the workflow using the environment variable set earlier:
ros2 launch isaac_ros_manipulation_bringup workflows.launch.py \
   manipulator_workflow_config:=${ISAAC_ROS_MANIPULATION_WORKFLOW_CONFIG_DIR}/my_robot_config.yaml
ros2 launch isaac_ros_manipulation_bringup workflows.launch.py \
   manipulator_workflow_config:=${ISAAC_ROS_MANIPULATION_WORKFLOW_CONFIG_DIR}/ur5e_robotiq_85_mac_and_cheese.yaml
ros2 launch isaac_ros_manipulation_bringup workflows.launch.py \
   manipulator_workflow_config:=${ISAAC_ROS_MANIPULATION_WORKFLOW_CONFIG_DIR}/ur10e_robotiq_2f_140_mac_and_cheese.yaml
Execute Pick and Place#
On the UR teach pendant: Press play to enable the robot.
Open a new terminal and activate the Isaac ROS environment:
isaac-ros activateSet the necessary environment variables:
export RMW_IMPLEMENTATION=rmw_cyclonedds_cpp
Trigger the workflow with an action goal:
All objects to one location:
ros2 action send_goal --feedback /multi_object_pick_and_place isaac_ros_manipulation_interfaces/action/MultiObjectPickAndPlace \
  '{target_poses: {header: {frame_id: "base_link"}, poses: [{position: {x: -0.25, y: 0.45, z: 0.50}, orientation: {w: 0.017994, x: -0.677772, y: 0.734752, z: 0.020993}}]}, class_ids: [], mode: 0}'
Objects sorted by class:
ros2 action send_goal --feedback /multi_object_pick_and_place isaac_ros_manipulation_interfaces/action/MultiObjectPickAndPlace \
  '{target_poses: {header: {frame_id: "base_link"}, poses: [{position: {x: -0.25, y: 0.50, z: 0.70}, orientation: {w: 0.017994, x: -0.677772, y: 0.734752, z: 0.020993}}, {position: {x: -0.25, y: 0.40, z: 0.40}, orientation: {w: 0.017994, x: -0.677772, y: 0.734752, z: 0.020993}}]}, class_ids: ["22", "3"], mode: 1}'
Warning
Update these example poses with positions safe and reachable in your robot’s workspace.
Refer to API Reference for complete action interface documentation.
Troubleshooting#
Why does my robot fail to move ?#
This issue can occur due to a variety of reasons, but we detail the most common reasons here in order of priority.
Ghost Voxels due to poor depth estimation: If the user has enabled NvBlox, the depth estimation can have some false positives and can add ghost voxels to the environment. The user can visualize the depth voxel cloud from NvBlox on
Rvizor Foxglove and verify that this is the case. The user can experiment with better depth estimation by using theESS_FULL,FOUNDATION_STEREO_LOW_RES, orFOUNDATION_STEREO_HIGH_RESmodels by changing thedepth_typeandenable_dnn_depth_in_realsenseparameters in the manipulator configuration file. The workflow automatically selects the correct engine file for the chosendepth_type— see Engine File Path Configuration. You can also turn off NvBlox and generate a static planning scene from a MoveIt scene file.Ghost Voxels due to poor calibration: If the user has performed a poor calibration, then the robot can potentially think it is in self collision with the environment - leading to planning failures.
Pose Estimation: If the object is not being detected or in a position that is not accessible to the robot- planning failures can occur. The user should take a look at the pose estimation that is output and verify that it is correct. Quite often the mesh files and segmentation mask being generated might not be accurate and so the user is expected to take care that they are referencing the correct mesh files in their manipulator workflow configuration file.
System Load: If the user is running a heavy system load, then the system can fail in non obvious ways. An example is when the user is running with 2 cameras with
FOUNDATION_STEREO_LOW_RES/FOUNDATION_STEREO_HIGH_RESdepth estimation andNvBloxenabled, this can lead to slowdowns and in some cases cameras shutting down. Please verify that the system is not overloaded by looking at the NITROS diagnostics and verifying all topics are being published and received by the system. One might need to over throttle the system or reduce the frame rate of the cameras.
Next Steps#
isaac_ros_manipulation_pick_and_place - Package documentation and standalone testing
Configuration Guide - Advanced configuration and troubleshooting
API Reference - Complete API documentation
isaac_ros_manipulation_orchestration - Behavior tree framework details