

Tutorial for DOPE Inference with Triton#
Overview#
This tutorial walks you through a graph to estimate the 6DOF pose of a target object using DOPE using different backends. It uses input monocular images from a rosbag. The different backends shown are:
PyTorch and ONNX
TensorRT Plan files with Triton
PyTorch model with Triton
Tutorial Walkthrough#
Complete until
Run Launch Fileof the quickstart here.Install Isaac ROS Triton:
sudo apt-get install -y ros-lyrical-isaac-ros-triton
Make a directory called
dope_ketchupinside${ISAAC_ROS_WS}/isaac_ros_assets/models/triton, which will serve as the model repository. This will be versioned as1. The downloaded model will be placed here:mkdir -p ${ISAAC_ROS_WS}/isaac_ros_assets/models/triton/dope_ketchup/1 && \ cp ${ISAAC_ROS_WS}/isaac_ros_assets/models/dope/Ketchup.pth ${ISAAC_ROS_WS}/isaac_ros_assets/models/triton/dope_ketchup/
Now select a backend:
To run ONNX models with Triton, export the model into an ONNX file using the
dope_converterscript provided:ros2 run isaac_ros_dope dope_converter.py --format onnx \ --input ${ISAAC_ROS_WS}/isaac_ros_assets/models/triton/dope_ketchup/Ketchup.pth --output ${ISAAC_ROS_WS}/isaac_ros_assets/models/triton/dope_ketchup/1/model.onnx \ --input_name INPUT__0 --output_name OUTPUT__0 --row 720 --col 1280
The converter may create a
model.onnx.datafile alongsidemodel.onnx. Keep both files in the model version directory.To run
TensorRT Planfiles with Triton, first export the ONNX model as described above. Then usetrtexecon the target platform to convert the ONNX model to a platform-specific plan file:/usr/src/tensorrt/bin/trtexec --onnx=${ISAAC_ROS_WS}/isaac_ros_assets/models/triton/dope_ketchup/1/model.onnx --saveEngine=${ISAAC_ROS_WS}/isaac_ros_assets/models/triton/dope_ketchup/1/model.plan
Build the plan in the same target environment where Triton will run. TensorRT plan files must match the target hardware and TensorRT runtime version.
To run a PyTorch model with Triton, the model needs to be saved using
torch.jit.save(). The downloaded DOPE model is saved withtorch.save(). Export the DOPE model using thedope_converterscript:ros2 run isaac_ros_dope dope_converter.py --format pytorch \ --input ${ISAAC_ROS_WS}/isaac_ros_assets/models/triton/dope_ketchup/Ketchup.pth --output ${ISAAC_ROS_WS}/isaac_ros_assets/models/triton/dope_ketchup/1/model.pt --row 720 --col 1280
Create a configuration file for this model at path
${ISAAC_ROS_WS}/isaac_ros_assets/models/triton/dope_ketchup/config.pbtxt. Note that name has to be the same as the model repository. Depending on the platform selected from a previous step, a slightly differentconfig.pbtxtfile must be created:onnxruntime_onnx(.onnxfile),tensorrt_plan(.planfile) orpytorch_libtorch(.ptfile):name: "dope_ketchup" platform: <insert-platform> max_batch_size: 0 input [ { name: "INPUT__0" data_type: TYPE_FP32 dims: [ 1, 3, 720, 1280 ] } ] output [ { name: "OUTPUT__0" data_type: TYPE_FP32 dims: [ 1, 25, 90, 160 ] } ] version_policy: { specific { versions: [ 1 ] } }
The
<insert-platform>part should be replaced withonnxruntime_onnxfor.onnxfiles,tensorrt_planfor.planfiles andpytorch_libtorchfor.ptfiles.Note
The DOPE decoder currently works with the output of a DOPE network that has a fixed input size of 640 x 480, which are the default dimensions set in the script. In order to use input images of other sizes, make sure to crop or resize using ROS 2 nodes from Isaac ROS Image Pipeline or similar packages. If another image resolution is desired, refer to here.
Note
- The model name must be
model.<selected-platform-extension>.
Start
isaac_ros_dopeusing the launch file:ros2 launch isaac_ros_dope isaac_ros_dope_triton.launch.py model_name:=dope_ketchup model_repository_paths:=[${ISAAC_ROS_WS}/isaac_ros_assets/models/triton] input_binding_names:=['INPUT__0'] output_binding_names:=['OUTPUT__0'] object_name:=Ketchup
Note
object_nameshould correspond to one of the objects listed in the DOPE configuration file, and the specified model should be a DOPE model that is trained for that specific object.Open another terminal and activate the Isaac ROS environment:
isaac-ros activateThen, play the rosbag:
ros2 bag play -l ${ISAAC_ROS_WS}/isaac_ros_assets/isaac_ros_dope/quickstart.bag
Open another terminal window and attach to the same container. You should be able to get the poses of the objects in the images through
ros2 topic echo:In a third terminal, activate the Isaac ROS environment:
isaac-ros activateros2 topic echo /detections
Note
We are echoing
/detectionsbecause we remapped the original topic/dope/detectionstodetectionsin the launch file.Install RViz and the
vision_msgsRViz plugin:sudo apt-get install -y ros-lyrical-rviz2 ros-lyrical-vision-msgs-rviz-plugins source /opt/ros/lyrical/setup.bash
Now visualize the detections array in RViz2:
rviz2
Make sure to update the
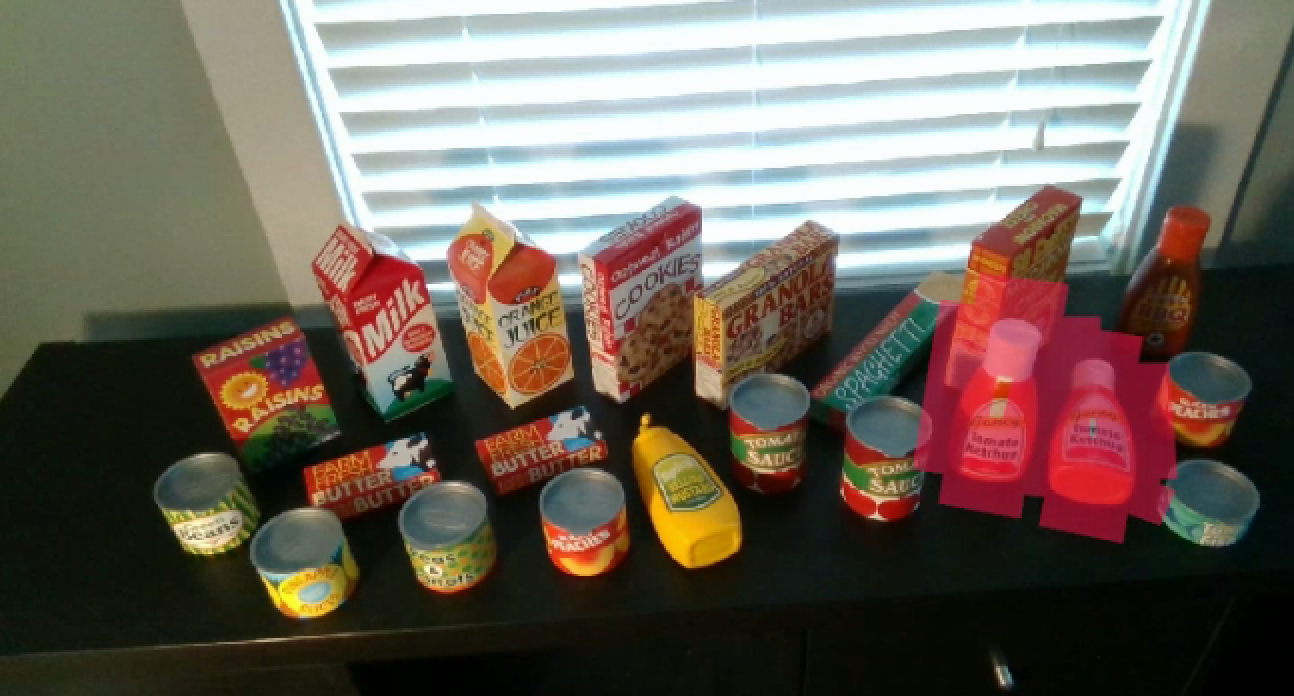
Fixed Frametotf_camera. Then click on theAddbutton, selectBy display typeand chooseDetection3DArrayundervision_msgs_rviz_plugins. Expand theDetection3DArraydisplay and change the topic to/detections. Check theOnly Edgeoption. Then click on theAddbutton again and selectBy Topic. Under/dope_encoder, expand the/resizedrop-down, select/image, and click theCameraoption to see the image with the bounding box over detected objects. Refer to the pictures below.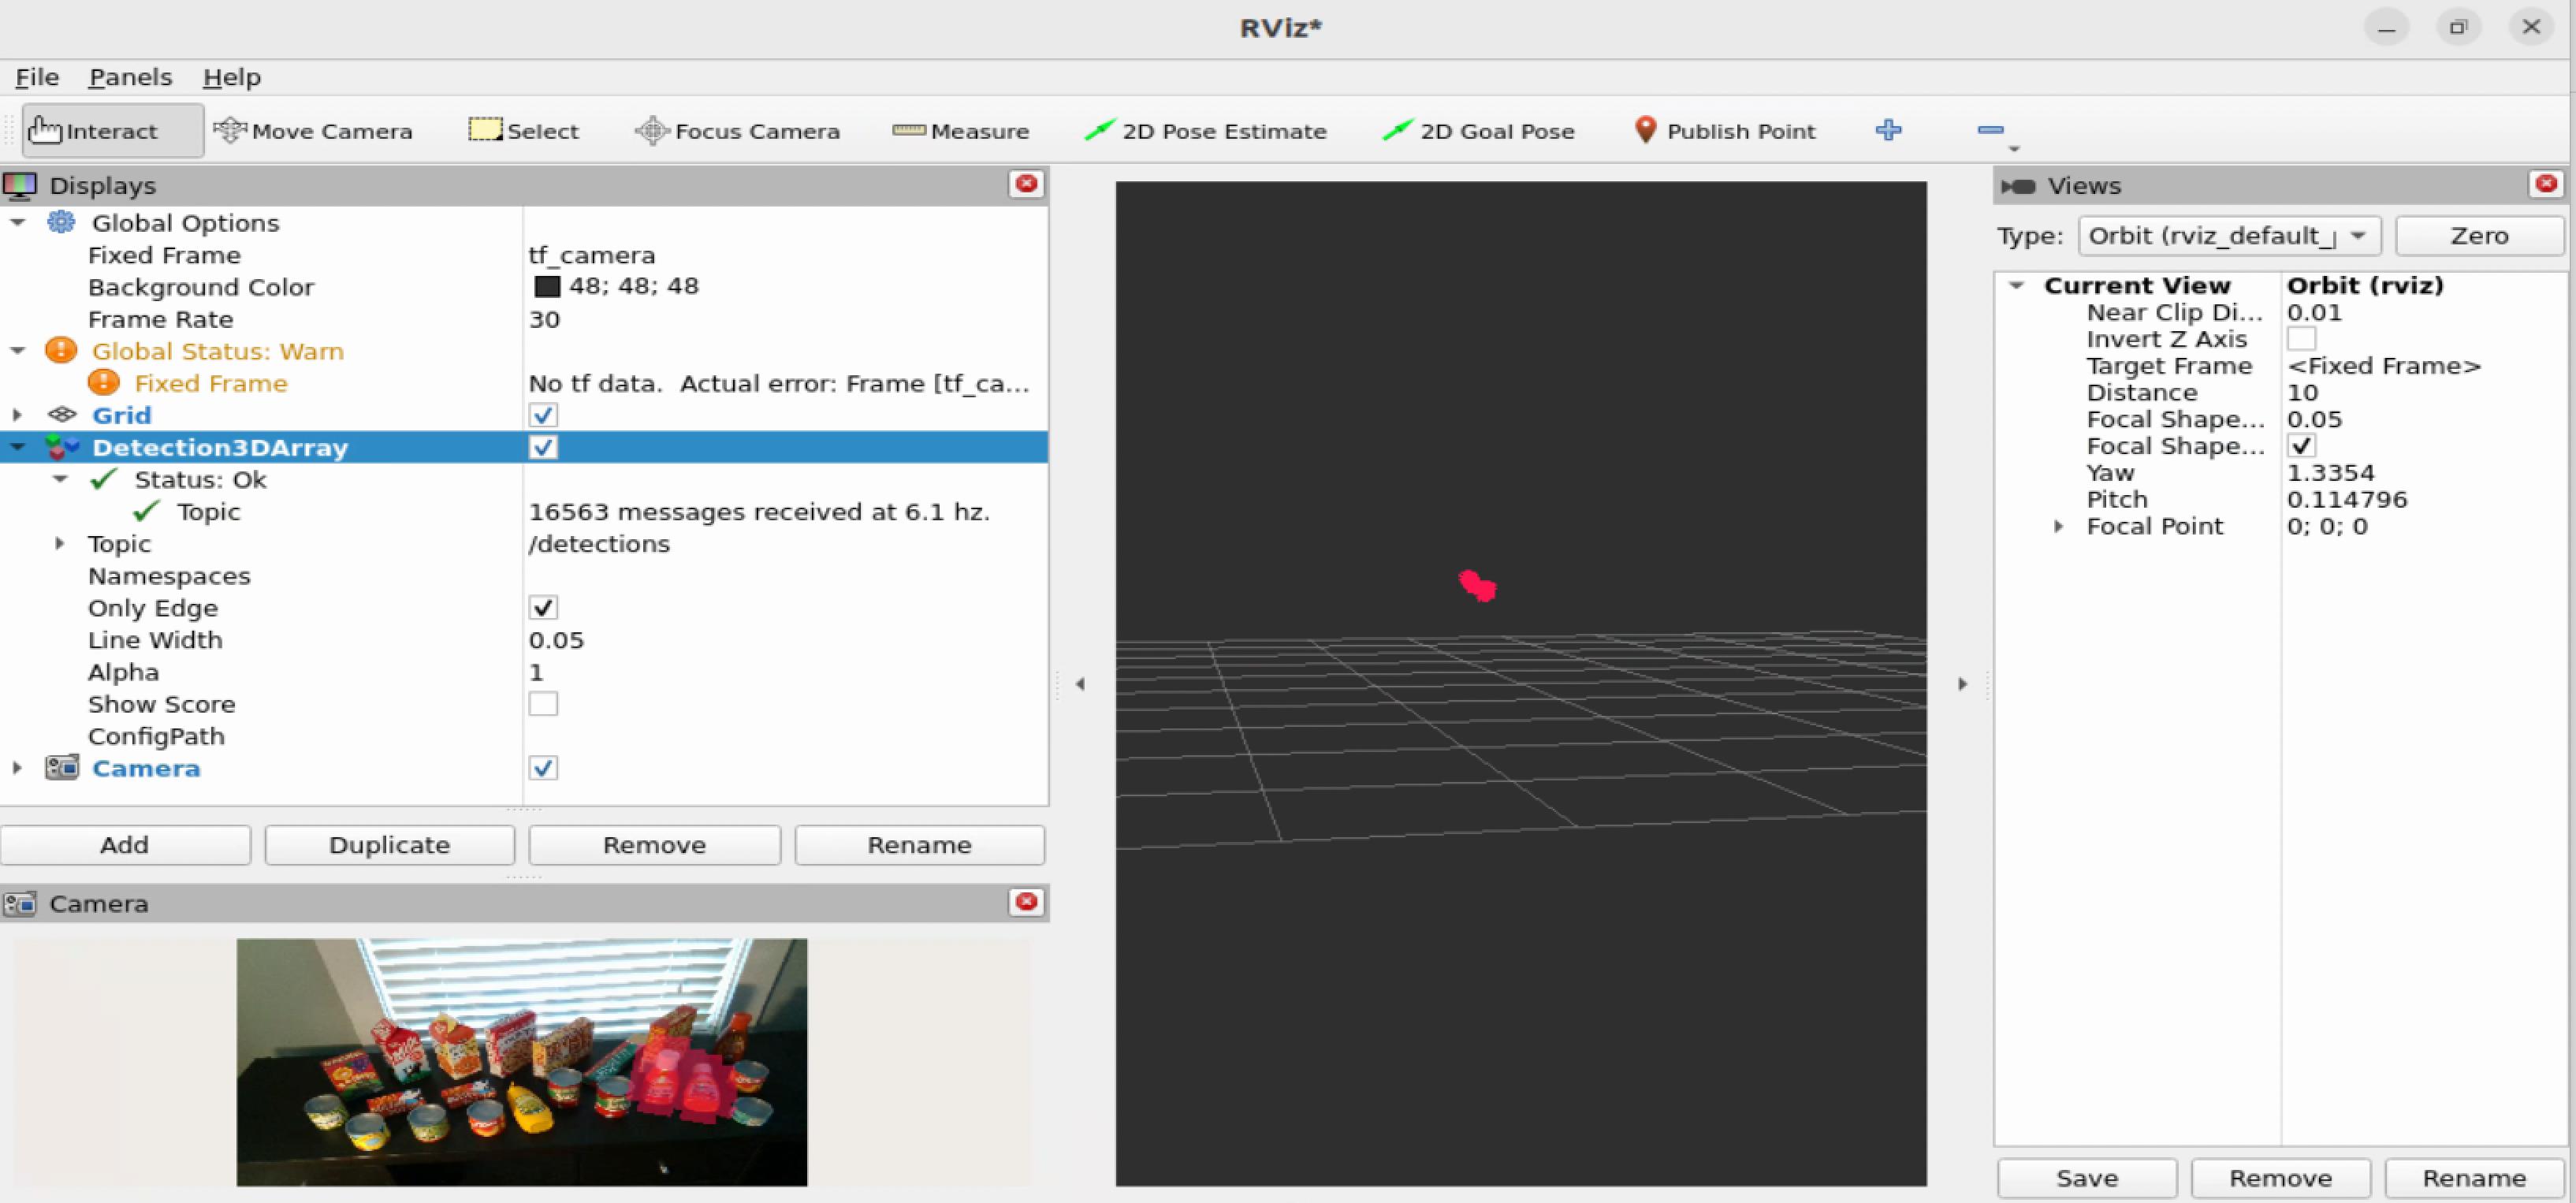
Note
For best results, crop/resize input images to the same dimensions your DNN model is expecting.